Creating and Initializing a Function
Creating a Function
- Log in to the FunctionGraph console, and choose Functions > Function List in the navigation pane.
- Click Create Function.
- Configure the function information by performing the following steps:
- Configure the basic information according to Table 1. The parameters marked with an asterisk (*) are mandatory.
Table 1 Basic information Parameter
Description
Template
This example uses no template.
To use a template, see Creating a Function Using a Template.
*Function Name
Name of the function, which must meet the following requirements:
- Consists of 1 to 60 characters, and can contain letters, digits, hyphens (-), and underscores (_).
- Starts with a letter and ends with a letter or digit.
Enter HelloWorld.
Function Type
- Event Function: triggered by triggers.
- HTTP functions: triggered once HTTP requests are sent to specific URLs.NOTE:
- HTTP functions do not distinguish between programming languages. The handler must be set in the bootstrap file. You can directly write the startup command, and allow access over port 8000.
- Only APIG triggers can be created for HTTP functions.
*Region
Select a region where you will deploy your code.
Agency
An agency is required if FunctionGraph accesses other cloud services. For details on how to create an agency, see Creating an Agency.
No agency is required if FunctionGraph does not access any cloud services.
For this example, select Use no agency.
*Enterprise Project
Select a created enterprise project and add the function to it. By default, default is selected.
Runtime
Select a runtime to compile the function.
NOTICE:CloudIDE supports Node.js, Python, and PHP only.
NoteTo ensure optimal performance, select Specify an exclusive agency for function execution and set different agencies for function configuration and execution. You can also use no agency or specify the same agency for both purposes.
- Function execution agency: After specifying such an agency, you can obtain a token and AK/SK from the context in the function handler for accessing other cloud services.
- Configure the code information according to Table 2. The parameters marked with an asterisk (*) are mandatory.
Table 2 Code information Parameter
Description
*Runtime
Python 2.7, Python 3.6, Python 3.9, Python 3.10, Node.js 6.10, Node.js 8.10, Node.js 10.16, Node.js 12.13, Node.js 14.18, Node.js 16.17, Node.js 18.15, Java 8, Java 11, Java 17, Go 1.x, C#(.NET Core 2.1), C#(.NET Core 3.1), C#(.NET Core 6.0), Cangjie 1.0, Custom, and PHP 7.3 are supported.
In this example, select Node.js 6.10.
*Handler
For a Node.js function, the handler must be named in the format of [file name].[function name], which must contain a period (.).
Enter index.handler, which indicates that the file name is index.js and the function name is handler.
*Code Entry Mode
Select Edit code inline, and use the displayed sample code.
Notice- When you write code in Python, do not name your package with the same suffix as a standard Python library, such as json, lib, and os. Otherwise, an error indicating a module loading failure will be reported.
- If the code to be uploaded contains sensitive information (such as account passwords), encrypt the sensitive information to prevent leakage.
NoteThe sample code enables you to obtain test events and print test event information. The code is as follows:
exports.handler = function (event, context, callback) {const error = null;const output = `Hello message: ${JSON.stringify(event)}`;callback(error, output);}
- Configure the basic information according to Table 1. The parameters marked with an asterisk (*) are mandatory.
- Confirm the function configuration and billing information, and click Create Now. Note
After the function is created, the memory is 128 MB and the execution timeout is 3s.
Initializing the Function
If initialization is enabled for a function, a specified initializer will be invoked to initialize the function, and then a handler will be invoked to process requests. For details on how to create a function, see Creating a Function.
- Log in to the FunctionGraph console, and choose Functions > Function List in the navigation pane.
- Click the name of the created function.
- Choose Configuration > Lifecycle and enable Initialization, as shown in Figure 1.
Figure 1 Setting an initializer
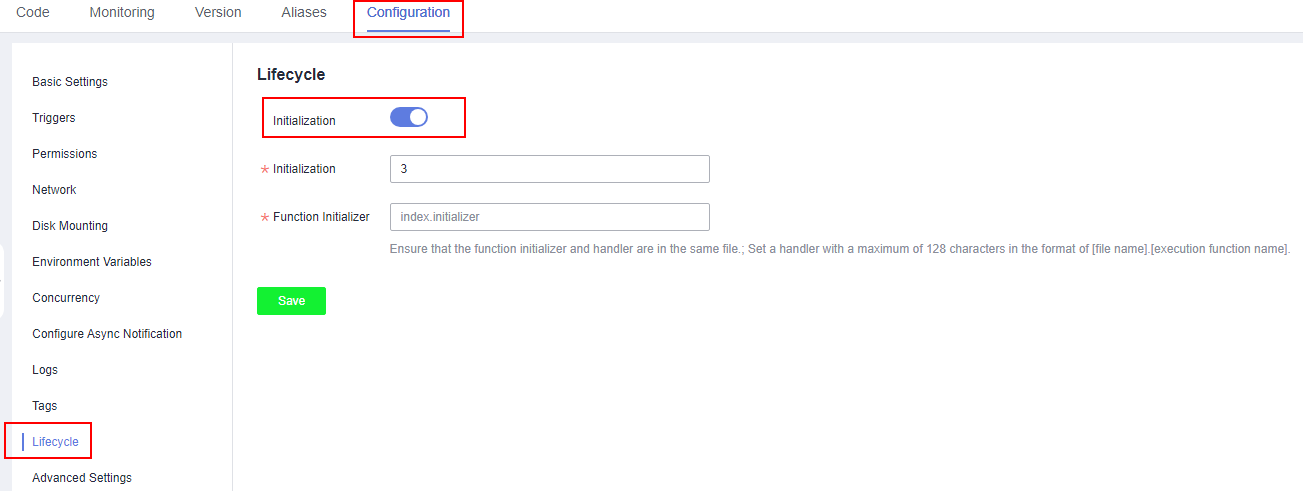
Table 3 Parameter configuration Parameter
Description
Initialization
Enable initialization if needed.
Initialization Timeout (s)
Maximum duration the function can be initialized. Set this parameter if you enable function initialization.
The value ranges from 1s to 300s.
Function initializer
You can enable function initialization on the Configuration tab page. The initializer must be named in the same way as the handler. For example, for a Node.js or Python function, set an initializer name in the format of [file name].[initialization function name].
NOTE:- This parameter is not required if function initialization is disabled.
- Ensure that the function initializer and handler are in the same file.
Note- Set the initializer in the same way as the handler. For example, for a Node.js or Python function, set an initializer name in the format of [file name].[initialization function name].
- For details on how to configure the code information, see Table 2.
- Click Save.
Testing the Function
For details on how to configure test events and test functions, see Test Management.
Setting an Alias
For details about how to set an alias, see Version and Alias Management.
- Creating a Function
- Initializing the Function
- Testing the Function
- Setting an Alias