For details about the APIG event source, see Supported Event Sources.
Prerequisites
You have created an API group, for example, APIGroup_test. For details, see Creating an API Group.
Creating an APIG Trigger
- Log in to the FunctionGraph console, and choose Functions > Function List in the navigation pane.
- Click Create Function.
- Set the following parameters:
- Template: Select Create from scratch.
- Function Name: Enter a function name, for example, apig.
- Enterprise Project: Select default.
- Agency: Select Use no agency.
- Runtime: Select Python 2.7.
- Click Create Now.
- On the Code tab page, copy the following code to the code window and click Deploy.# -*- coding:utf-8 -*-import jsondef handler (event, context):body = "<html><title>Functiongraph Demo</title><body><p>Hello, FunctionGraph!</p></body></html>"print(body)return {"statusCode":200,"body":body,"headers": {"Content-Type": "text/html",},"isBase64Encoded": False}
- Choose Configuration > Triggers and click Create Trigger.
- Configure the trigger information.
Table 1 Trigger information Parameter
Description
Trigger Type
Select API Gateway (Dedicated Gateway).
API Name
Enter an API name, for example, API_apig.
API Group
An API group is a collection of APIs. You can manage APIs by API group.
Select APIGroup_test.
Environment
An API can be called in different environments, such as production, test, and development environments. API Gateway provides the environment management function, which allows you to define different request paths for an API in different environments.
To ensure that the API can be called, select RELEASE.
Security Authentication
There are three authentication modes:
- App: AppKey and AppSecret high security authentication. This authentication mode is recommended. For details, see App Authentication.
- IAM: IAM medium security authentication. This mode grants access to IAM users only. For details, see IAM Authentication.
- None: No authentication. Access is granted to all users.
Select None.
Protocol
There are two types of protocols:
- HTTP
- HTTPS
Select HTTPS.
Timeout (ms)
Enter 5000.
- Click OK.
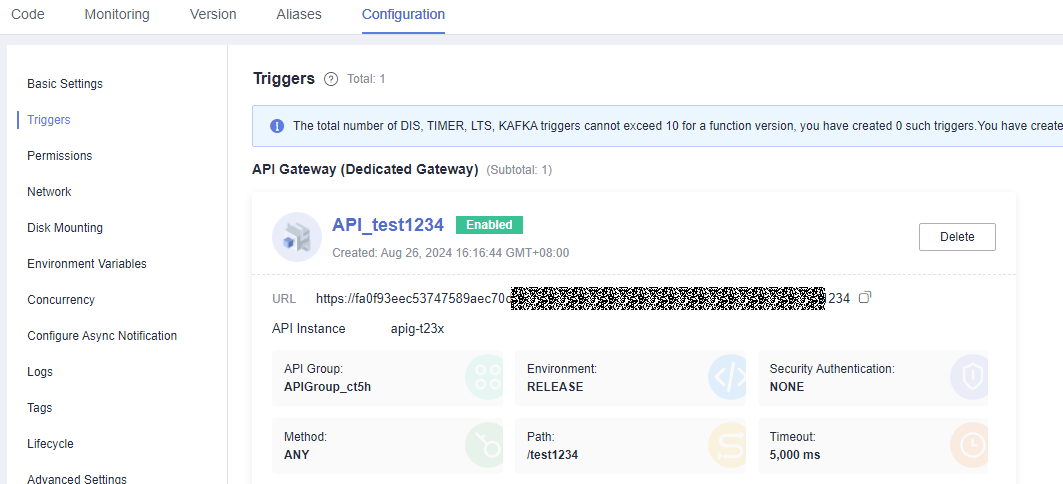
Figure 1 APIG trigger
 Note
Note- URL indicates the calling address of the APIG trigger.
- After the APIG trigger is created, an API named API_apig is generated on the API Gateway console. You can click the API name in the trigger list to go to the API Gateway console.
Invoking the Function


Viewing the Execution Result
- In the navigation pane of the FunctionGraph console, choose Functions > Function List.
- Click the name of the apig function.
- On the function details page, choose Monitoring > Logs tab to view function logs.