Checking or Creating a Policy Group
You can group policies and servers to batch apply policies to servers, easily adapting to business scenarios.
Precautions
- When you enable the enterprise edition, the default policy group of this edition (including weak password and website shell detection policies) takes effect for all your servers.
- When you enable the premium or WTP edition, the edition is bound to default_premium_policy_group.
To create your own policy group, you can copy the default policy group and add or remove policies in the copy.
Policy List
Policy | Action | Supported OS | Enterprise Edition | Premium Edition | WTP Edition |
|---|---|---|---|---|---|
Weak password detection | Change weak passwords to stronger ones based on HSS scan results and suggestions. | Linux and Windows | √ (Check only custom weak passwords) | √ | √ |
Web shell detection | Scan web directories on servers for web shells. | Linux and Windows | √ (Check only specified detection paths) | √ | √ |
Assets | Scan and display all software in one place, including software name, path, and major applications, helping you identify abnormal assets. | Linux and Windows | × | √ | √ |
System configuration detection | Check for unsafe Tomcat, Nginx, and SSH login configurations. | Linux and Windows | × | √ | √ |
High-risk command detection | Check executed commands in real time and generate alarms if high-risk commands are detected. | Linux | × | √ | √ |
Privilege escalation detection | Detect privilege escalation for processes and files in the current system. The following abnormal privilege escalation operations can be detected:
| Linux | × | √ | √ |
Abnormal shell detection | Detect actions on abnormal or reverse shells, including moving, copying, and deleting shell files, and modifying the access permissions and hard links of the files. | Linux | × | √ | √ |
File integrity monitoring | Check the files in the Linux OS, applications, and other components to detect tampering. | Linux | × | √ | √ |
Accessing the Policies Page
- Log in to the management console.
- In the upper left corner of the page, select a region, click
 , and choose .
 - In the navigation pane, choose Security Operations > Policies.
Checking the Policy Group List
- Go to the Policies page, as shown in Figure 1. For more information, see Table 1.Note
- default_enterprise_policy_group is the default policy group of the enterprise edition. This policy group can only be viewed, and cannot be copied or deleted.
- default_premium_policy_group is the default policy group of the premium edition. You can create a policy group by copying this default group and modify the copy.
- To refresh the list, click
 in the upper right corner.
 - To view details about the servers associated with a policy group, click the number in the Servers column of the group.
Figure 1 Policy group list
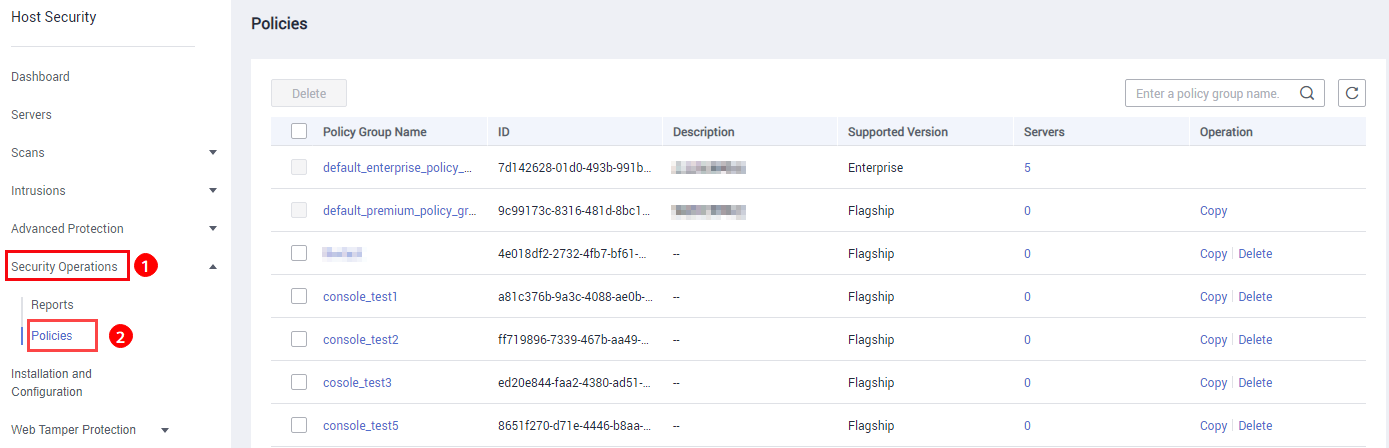
Table 1 Policy group parameters Parameter
Description
Policy Group Name
Name of a policy group
ID
Unique ID of a policy group
Description
Description of a policy group
Supported Version
HSS edition supported by a policy group
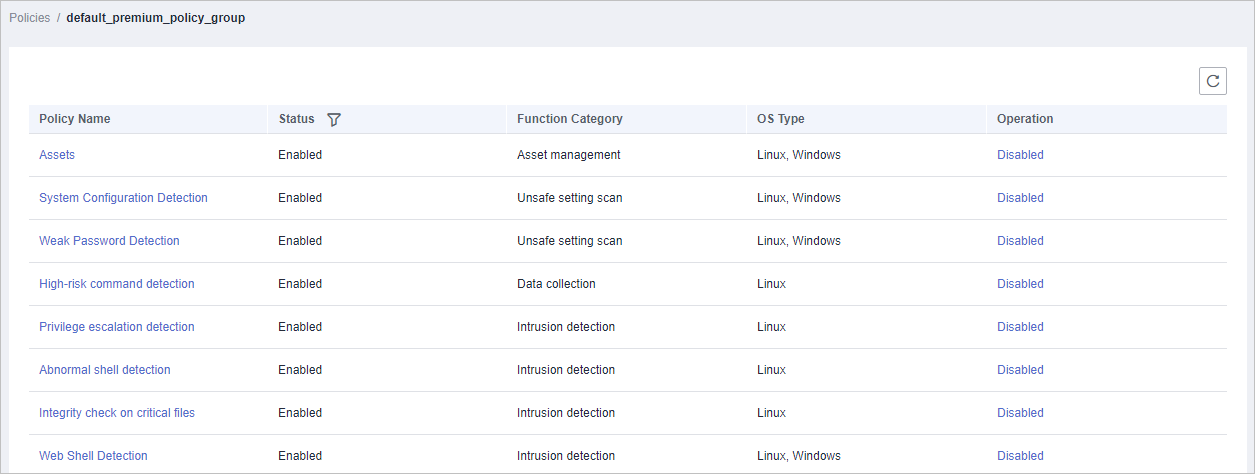
- Click the name of a policy group to check policy details, including the names, statuses, function categories, OS type of the policies, as shown in Figure 2.Note
- By default, all policies in the groups default_enterprise_policy_group and default_premium_policy_group are enabled.
- You can click Enable or Disable in the Operation column of a policy to control what to check.
Figure 2 Policy group details
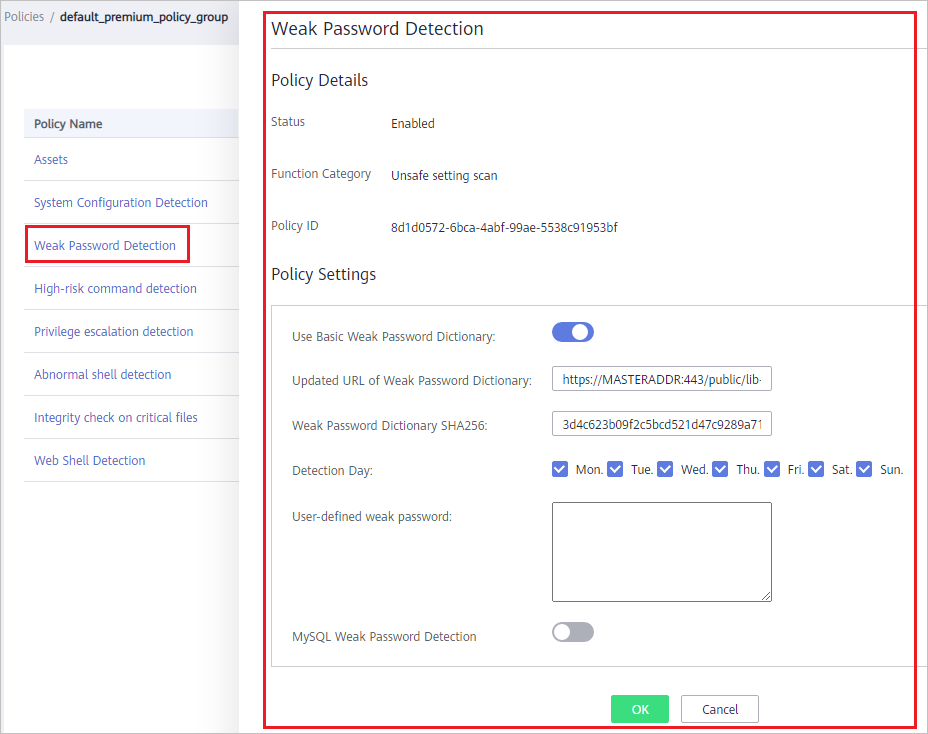
- Click the name of a policy to check its details. Figure 3 shows the Weak Password Detection policy as an example.Note
For details about how to modify a policy, see Modifying a Policy.
Figure 3 Policy details
Creating a Policy Group
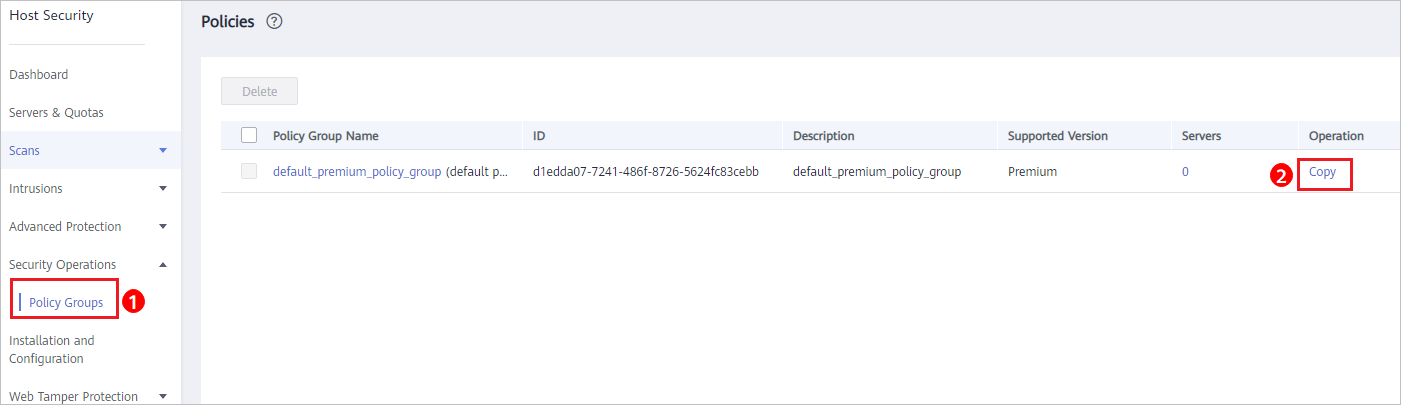
- In the row where default_premium_policy_group (default policy group of the premium edition) resides, click Copy in the Operation column, as shown in Figure 4.
Figure 4 Copying a policy group
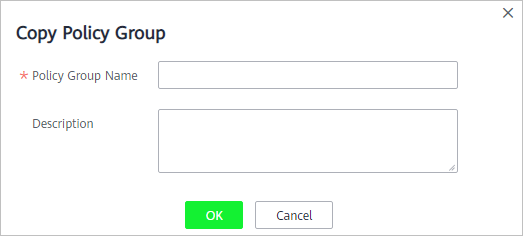
- In the dialog box displayed, enter a policy group name and description, and click OK, as shown in Figure 5.Note
- The name of a policy group must be unique, or the group will fail to be created.
- The policy group name and its description can contain only letters, digits, underscores (_), hyphens (-), and spaces, and cannot start or end with a space.
Figure 5 Creating a policy group
- Click OK.
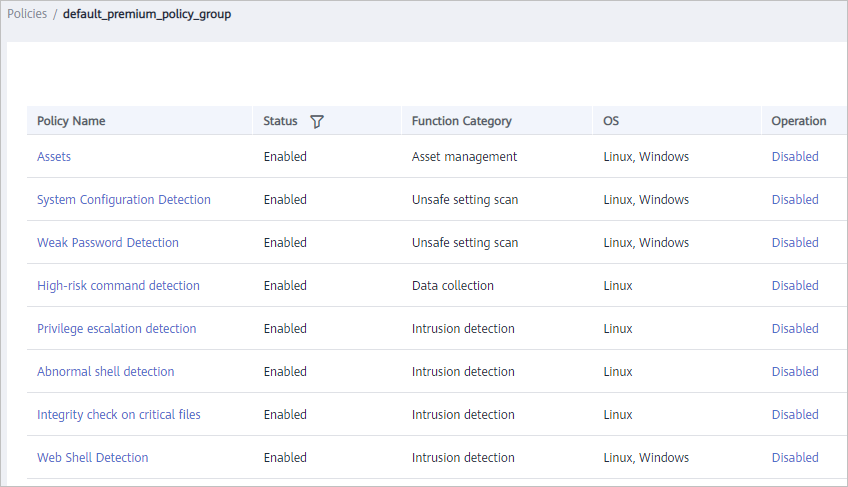
- Click the name of the policy group you just created. The policies in the group will be displayed, as shown in Figure 6.
Figure 6 Policies in a group
- Click a policy name and modify its settings as required. For details, see Modifying a Policy.
- Enable or disable the policy by clicking the corresponding button in the Operation column.
Follow-Up Procedure
Deleting a policy group
After a policy group is deleted, the Policy Group column of the servers that were associated with the group will be blank.
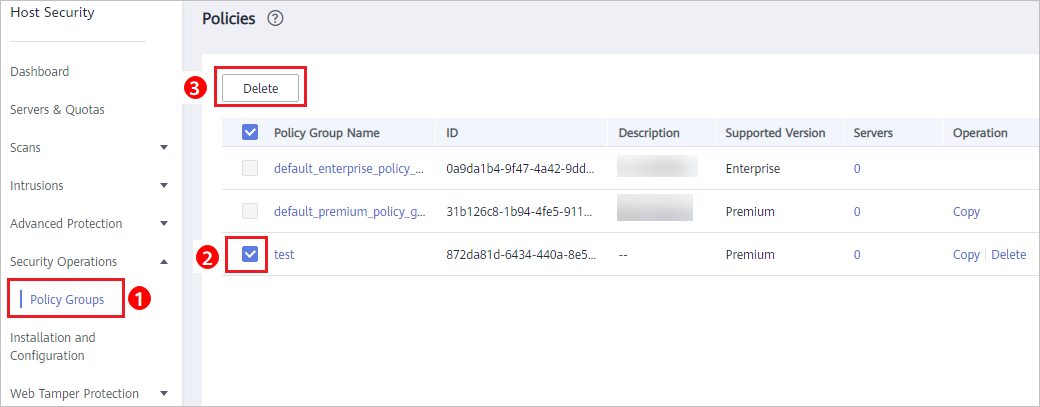
- Select one or more policy groups to be deleted and click Delete, as shown in Figure 7.
Figure 7 Deleting policy groups
 Note
NoteYou can also click Delete in the Operation column of a policy group to delete it.
- In the displayed dialog box, click OK.
- Precautions
- Policy List
- Accessing the Policies Page
- Checking the Policy Group List
- Creating a Policy Group
- Follow-Up Procedure