Quickly Creating an EVS Disk and Using It on a Windows Server
Scenarios
You can use EVS disks as system disks or data disks. System disks are created together with servers, while data disks can be created together with servers or separately. If you have created data disks separately, you must attach and initialize them before they can be used.
This section describes how a non-shared data disk can be created on the EVS console, attached to a Windows server, and initialized on the server.
Operation Process
Procedure | Description |
|---|---|
Create a data disk on the EVS console. | |
Attach the data disk to a Windows server. | |
Initialize the data disk on the server. |
Step 1: Create an EVS Disk
- Go to the Create Disk page.
- Log in to the console.
- Click
 in the upper left corner of the page and choose Storage > Elastic Volume Service.
 - Click Create Disk in the upper right corner.
- Configure mandatory parameters based on the following table and retain the default settings for other parameters.
Parameter
Example Value
Description
Region
Resources are region-specific and cannot be used across regions through internal network connections. For low network latency and quick resource access, select the nearest region.
AZ
-
You can only attach EVS disks to servers in the same AZ. After a disk is created, its AZ cannot be changed.
Data Source
Do not configure it.
If you want to create an empty data disk, do not configure a data source.
Disk Type
Ultra-high I/O
To learn more about disk types, see Disk Types and Performance.
Capacity
100 GiB
Enter a disk capacity.
Automatic Backup
Do not use
Automatic backup allows you to back up the disk data to ensure your data security and integrity.
More > Share
Do not selection this option.
A non-shared disk can only be attached to one server. The sharing attribute of a disk cannot be changed after the disk has been created.
More > SCSI
Select this option.
A SCSI disk allows the server OS to directly access the underlying storage media and send SCSI commands to the disk. The device type of a disk cannot be changed after the disk has been created.
More > Encryption
Select this option and use the default key.
EVS uses the industry-standard XTS-AES-256 cryptographic algorithm and keys to encrypt EVS disks. The encryption attribute of a disk cannot be changed after the disk has been created.
Disk Name
volume-0001
Enter a disk name.
Quantity
1
The preset disk quantity is 1, which means only one disk is created.
- Click Apply Now.
- Go back to the disk list page. When the status of the volume-0001 disk changes to In-use, the disk is successfully created.
Step 2: Attach the EVS Disk
EVS disks cannot be used alone. You need to attach them to cloud servers first. In the following example, the volume-0001 disk is attached.
- In the disk list, find the volume-0001 disk and click Attach in the Operation column.
- Attach the volume-0001 disk to your desired server. Ensure that the server and disk are in the same AZ.
- Click OK to go back to the disk list page. When the status of the volume-0001 disk changes to In-use, the disk is successfully attached.
Step 3: Initialize the EVS Disk
After attaching the volume-0001 disk, you need to initialize it before it can be used. In the following example, the disk is formatted into a 100 GiB GPT partition with the NTFS file system.
- Log in to the server.
For how to log in to an ECS, see the Elastic Cloud Server User Guide.
- On the desktop of the server, click the start icon in the lower left corner.
The Windows Server window is displayed.
- Click Server Manager.
The Server Manager window is displayed.
Figure 1 Server Manager
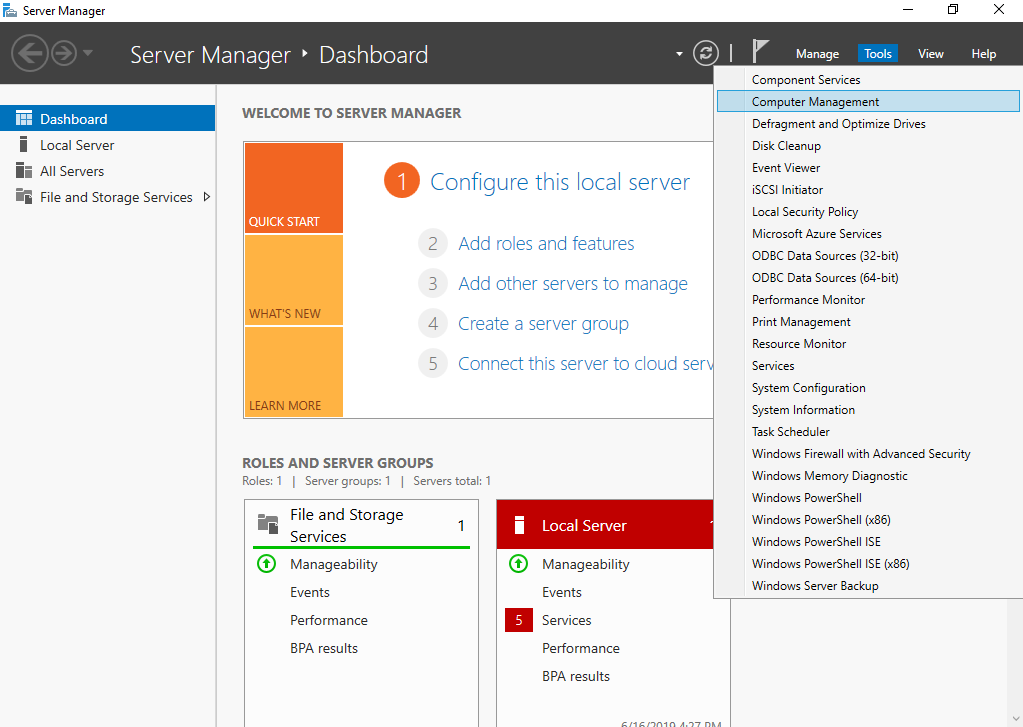
- In the upper right corner, choose Tools > Computer Management.
Figure 2 Computer Management
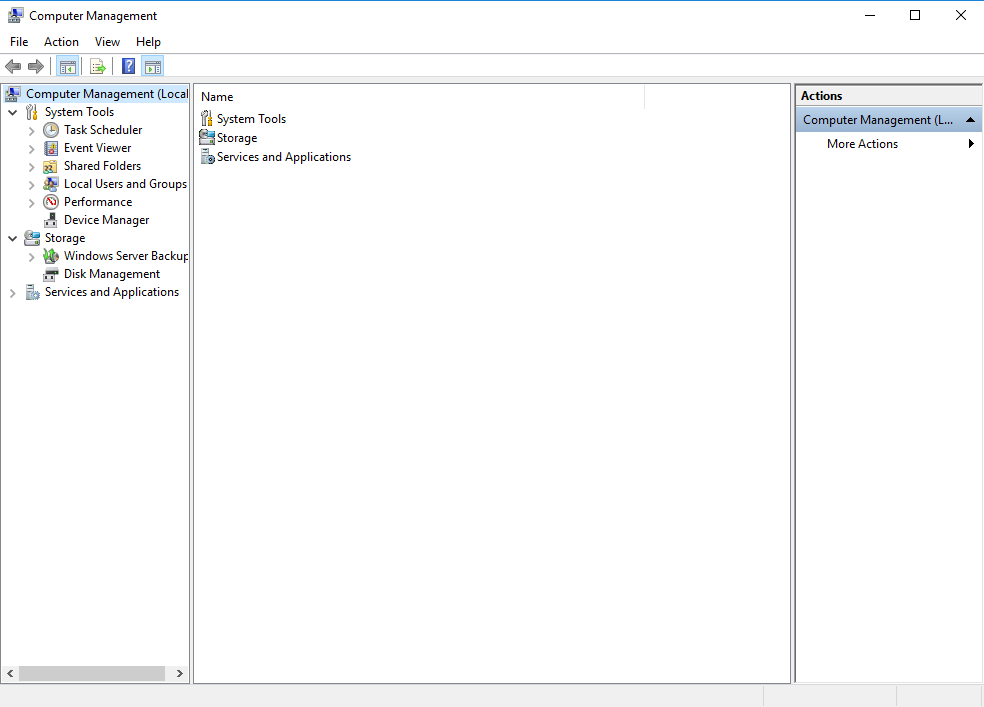
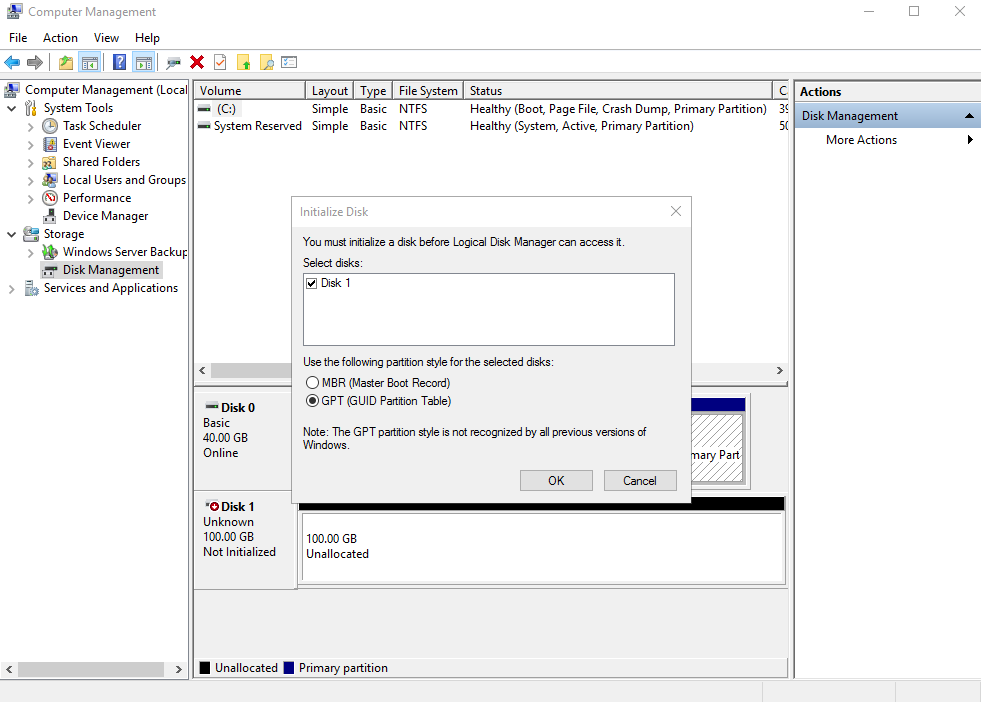
- Choose Storage > Disk Management.
Disks are displayed in the right pane. If there is a disk that is not initialized, the system will prompt you with the Initialize Disk dialog box.
In the Initialize Disk dialog box, the to-be-initialized disk is selected. Select a partition style and click OK. In this example, GPT (GUID Partition Table) is selected.
NoticeThe maximum disk size supported by MBR is 2 TiB, and that supported by GPT is 18 EiB. Because an EVS data disk currently supports up to 32 TiB, use GPT if your disk size is greater than 2 TiB.
If the partition style of an in-use disk is changed, all data on the disk will be lost, so take care to select an appropriate partition style when initializing the disk. If you must change the partition style to GPT, it is recommended that you back up the disk data before the change.
Figure 3 Disk list
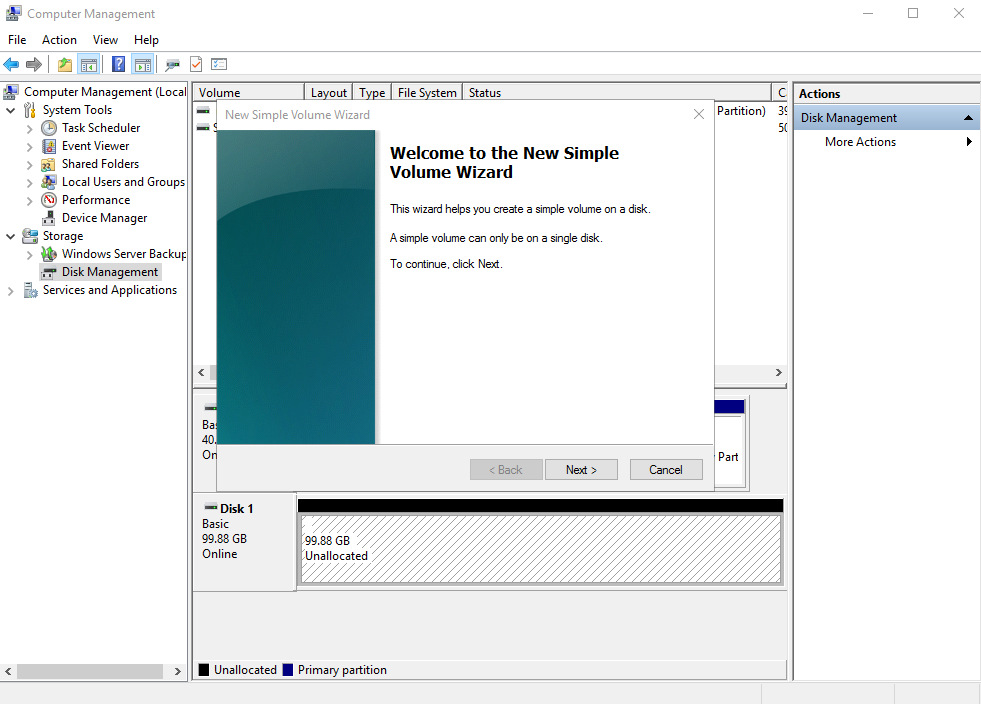
- In the Unallocated area of Disk 1, right-click the blank area and choose New Simple Volume.
Figure 4 Computer Management

The New Simple Volume Wizard window is displayed.
Figure 5 New Simple Volume Wizard
- Click Next to go to the Specify Volume Size page.
Figure 6 Specify Volume Size
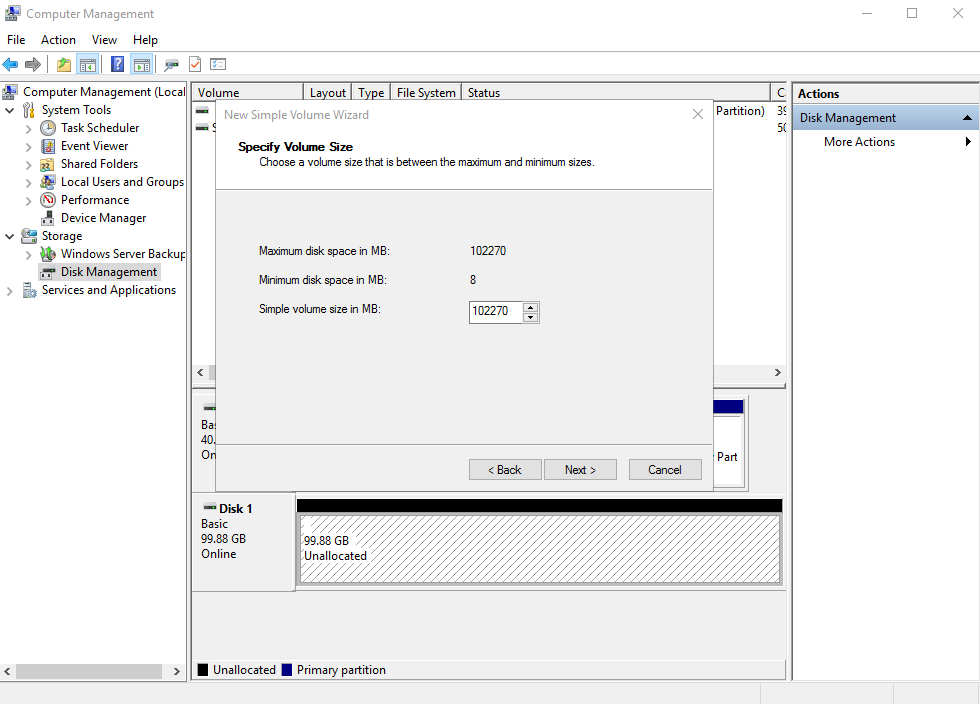
- Specify the volume size and click Next. The system selects the maximum volume size by default. You can specify the volume size as required. In this example, the default setting is used.
Figure 7 Assign Drive Letter or Path

- Assign a drive letter or path to your partition and click Next. The system assigns drive letter D by default. In this example, the default setting is used.
Figure 8 Format Partition
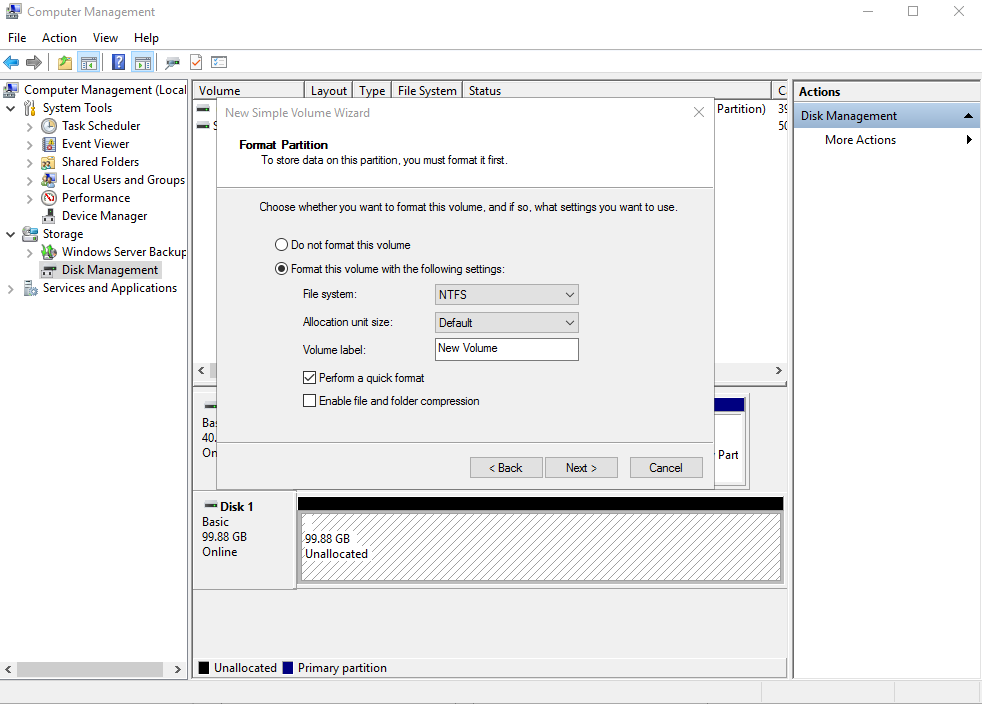
- Specify format settings and click Next. The system selects the NTFS file system by default. You can specify a file system format as required. In this example, the default setting is used.
Figure 9 Completing the New Simple Volume Wizard
 Notice
The partition sizes supported by file systems vary. Choose an appropriate file system format based on your service requirements.
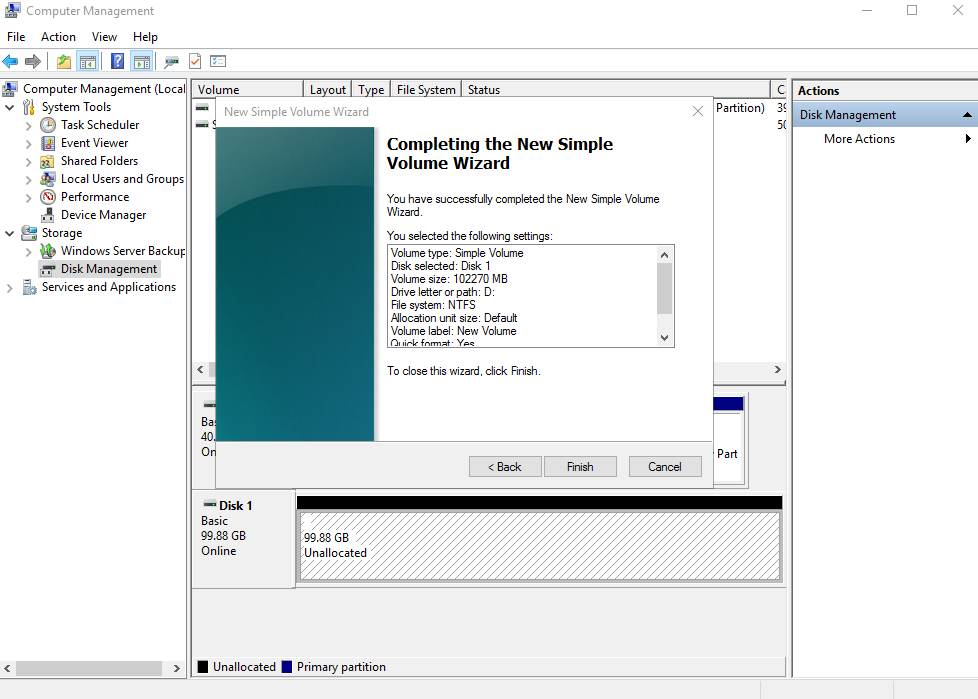
- Click Finish.
Wait for the initialization to complete. When the volume status changes to Healthy, the initialization has succeeded.
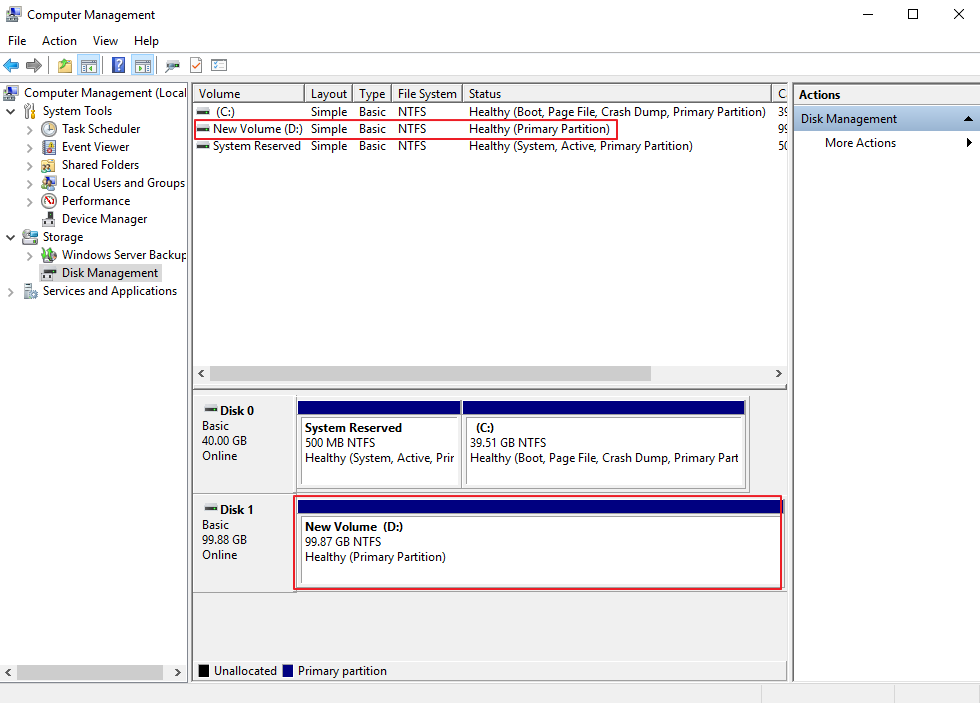
Figure 10 Disk initialized
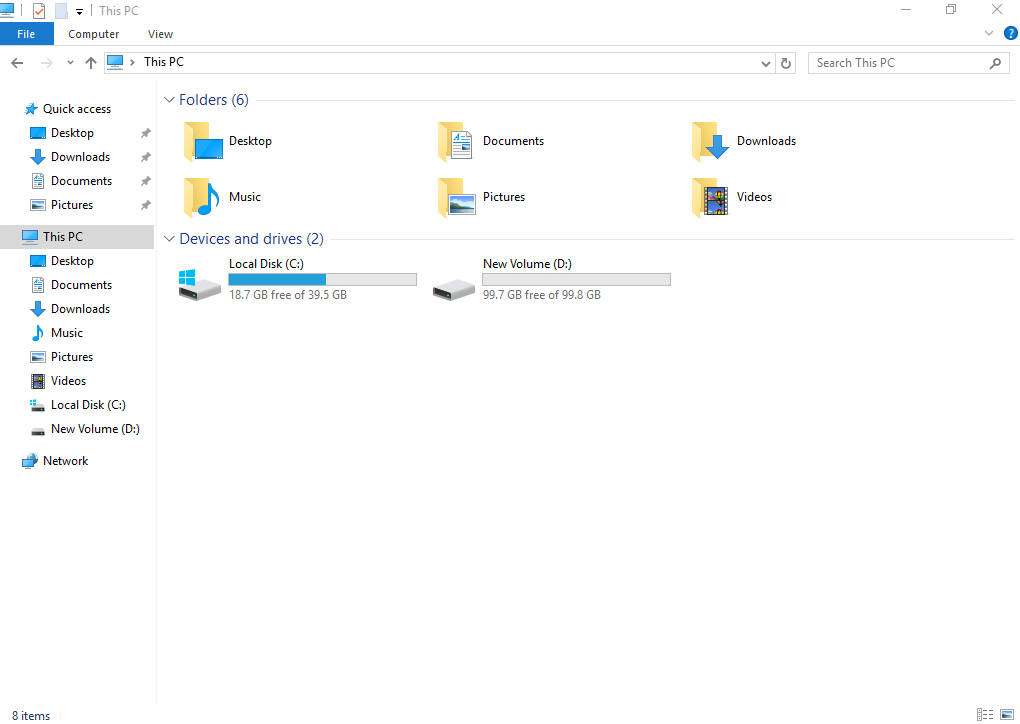
- After the volume is created, click
 on the task bar and check whether a new volume appears in the File Explorer. In this example, New Volume (D:) is the new volume.
If New Volume (D:) appears, the disk is successfully initialized and no further action is required.
Figure 11 File Explorer
You can use the disk after it is initialized.
- Scenarios
- Operation Process
- Step 1: Create an EVS Disk
- Step 2: Attach the EVS Disk
- Step 3: Initialize the EVS Disk