Connecting to a DB Instance from a Windows Server
You can connect to your DB instance from a local Windows server installed with SQL Server Management Studio over a public network.
You can connect to a DB instance through a non-SSL connection or an SSL connection using an RDS for SQL Server client. The SSL connection encrypts data and is more secure.
Preparations
- Install the RDS for SQL Server client.
For details, see section How Can I Install SQL Server Management Studio?
- Bind an EIP to the target DB instance and configure security group rules.
- Bind an EIP to the target DB instance.
For details about how to bind an EIP, see section Binding an EIP.
- Obtain the IP address of the local device.
- Configure security group rules.
Add the IP address obtained in 2.b and the instance port to the inbound rule of the security group.
For details about how to configure a security group rule, see section Configuring Security Group Rules.
- Run the ping command to connect the EIP that has been bound to the target DB instance in 2.a to check that the local device can connect to the EIP.
- Bind an EIP to the target DB instance.
Non-SSL Connection
- Start SQL Server Management Studio.
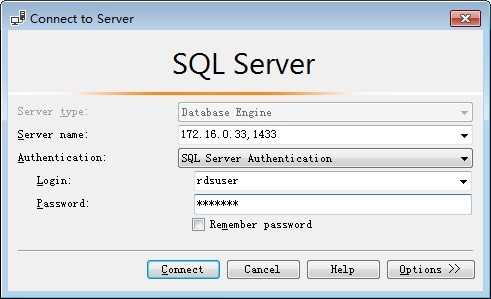
- Choose Connect > Database Engine. In the displayed dialog box, enter login information.
Figure 1 Connecting to the server

- Server name: indicates the IP address and port of the DB instance. Use a comma (,) to separate them. For example: x.x.x.x,8080.
- The IP address is the EIP that has been bound to the DB instance.
- The port is the database port in the Connection Information area on the Basic Information page of the DB instance.
- Authentication: indicates the authentication mode. Select SQL Server Authentication.
- Login: indicates the RDS database username. The default administrator is rdsuser.
- Password: indicates the password of the RDS database username.
- Server name: indicates the IP address and port of the DB instance. Use a comma (,) to separate them. For example: x.x.x.x,8080.
- Click Connect to connect to the DB instance.Note
If the connection fails, ensure that preparations have been correctly made in Preparations and try again.
SSL Connection
- Download the SSL root certificate and then upload it.
- In the DB Information area on the Basic Information page, click
 in the SSL field to download the root certificate or certificate bundle.
 - Import the root certificate to the Windows OS on the ECS. For details, see How Do I Import the SSL Certificate of an RDS Instance to a Windows or Linux Server?Note
- Replace the old certificate before it expires to improve system security.
- After you bind an EIP to a DB instance, you must reboot the instance for the SSL connection to take effect.
- In the DB Information area on the Basic Information page, click
- Start SQL Server Management Studio.
- Choose Connect > Database Engine. In the displayed dialog box, enter login information.
Figure 2 Connecting to the server
- Server name: indicates the IP address and port of the DB instance. Use a comma (,) to separate them. For example: x.x.x.x,8080.
- The IP address is the EIP that has been bound to the DB instance.
- The port is the database port in the Connection Information area on the Basic Information page of the DB instance.
- Authentication: indicates the authentication mode. Select SQL Server Authentication.
- Login: indicates the RDS database username. The default administrator is rdsuser.
- Password: indicates the password of the RDS database username.
- Server name: indicates the IP address and port of the DB instance. Use a comma (,) to separate them. For example: x.x.x.x,8080.
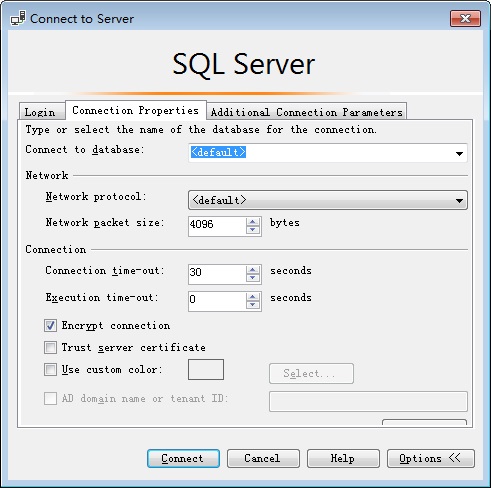
- Click Options. On the Connection Properties page, enter related parameters and select Encrypt connection to enable SSL encryption. (By default, Encrypt connection is not selected. You need to select it manually.)
Figure 3 Connection properties
- Click Connect to connect to the DB instance.Note
If the connection fails, ensure that preparations have been correctly made in Preparations and try again.
- Preparations
- Non-SSL Connection
- SSL Connection