Connecting to a DB Instance from a Linux ECS
After creating a DB instance, you can connect to it using a Linux ECS with a MySQL client installed over a private network. This section describes how to access a DB instance from an ECS using a standard MySQL client.
This section introduces how to connect to a DB instance with SSL disabled. To connect to a DB instance with SSL enabled, see Using MySQL CLI to Connect to an Instance Through a Private Network.
Operation Process
Process | Description |
|---|---|
Purchase a Linux ECS that is in the same region and VPC as your DB instance. | |
Test the network connectivity between the ECS and the floating IP address and port of the DB instance, and install the mysql client on the ECS. | |
Use a command-line interface (CLI) to connect to the DB instance using the floating IP address and port. |
Step 1: Create an ECS
- Log in to the management console and check whether there is an ECS available.
- If there is a Linux ECS, go to 3.
- If there is a Windows ECS, see Connecting to a DB Instance from a Windows ECS.
- If no ECS is available, go to 2.
- Create an ECS and select Linux (for example, CentOS) as its OS.
To download a MySQL client to the ECS, bind an EIP to the ECS. The ECS must be in the same region, VPC, and security group as the RDS for MySQL DB instance for mutual communications.
For details about how to purchase a Linux ECS, see "Purchasing an ECS" in Elastic Cloud Server User Guide.
- On the ECS Information page, check the VPC of the ECS.
- On the Basic Information page of the RDS for MySQL instance, check the VPC of the DB instance.
- Ensure that the ECS and RDS for MySQL instance are in the same region and VPC. Then go to Step 2: Test Connectivity and Install a MySQL Client.
- If they are not in the same region, create another ECS or DB instance. The ECS and DB instance in different regions cannot communicate with each other. To reduce network latency, deploy your DB instance in the region nearest to your workloads.
- If the ECS and DB instance are in different VPCs, change the VPC of the ECS to that of the DB instance. For details, see "Changing a VPC" in the Elastic Cloud Server User Guide.
Step 2: Test Connectivity and Install a MySQL Client
- Log in to the ECS. For details, see "Login Using VNC" in the Elastic Cloud Server User Guide.
- On the Instances page of the RDS console, click the DB instance name.
- Choose Connectivity & Security from the navigation pane. In the Connection Information area, obtain the floating IP address and database port of the DB instance.
- On the ECS, check whether the floating IP address and database port of the DB instance can be connected.
telnet 192.168.6.144 3306
- If yes, network connectivity is normal.
- If no, check the security group rules.
- Check the outbound rules of the ECS security group. By default, all outgoing network traffic is allowed.
If not all outgoing traffic is allowed, add an outbound rule for the floating IP address and port of the DB instance.
- If in the security group of the DB instance, there is no inbound rule allowing the access from the private IP address and port of the ECS, add an inbound rule for the private IP address and port of the ECS. For details, see Configuring Security Group Rules.
- Check the outbound rules of the ECS security group. By default, all outgoing network traffic is allowed.
- Download the mysql client installation package for Linux to the ECS. The package mysql-community-client-8.0.28-1.el6.x86_64.rpm is used as an example.
wget https://dev.mysql.com/get/mysql-community-client-8.0.28-1.el6.x86_64.rpm
NoteA MySQL client running a version later than that of the DB instance is recommended.
- Install the MySQL client.
rpm -ivh --nodeps mysql-community-client-8.0.28-1.el6.x86_64.rpm
Note- If any conflicts occur during the installation, add the replacefiles parameter to the command and install the client again.
rpm -ivh --replacefiles mysql-community-client-8.0.28-1.el6.x86_64.rpm
- If a message is displayed prompting you to install a dependent package during the installation, add the nodeps parameter to the command and install the client again.
rpm -ivh --nodeps mysql-community-client-8.0.28-1.el6.x86_64.rpm
- If any conflicts occur during the installation, add the replacefiles parameter to the command and install the client again.
Step 3: Connect to the DB Instance Using a CLI (Non-SSL Connection)
- Run the following command on the ECS to connect to the DB instance:
mysql -h <host> -P <port> -u <userName> -p
Example:
mysql -h 192.168.6.144 -P 3306 -u root -p
Table 1 Parameter description Parameter
Description
<host>
Floating IP address obtained in 3.
<port>
Database port obtained in 3. The default value is 3306.
<userName>
Administrator account root.
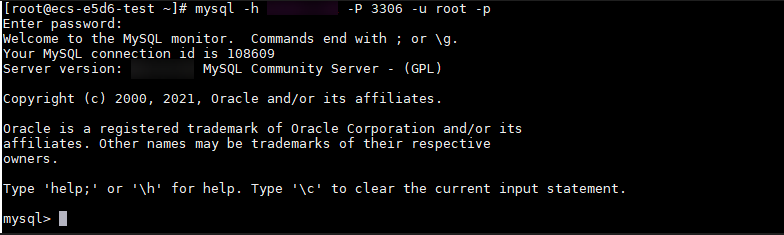
- Enter the password of the database account if the following information is displayed:Enter password:
Figure 1 Connection successful
- Operation Process
- Step 1: Create an ECS
- Step 2: Test Connectivity and Install a MySQL Client
- Step 3: Connect to the DB Instance Using a CLI (Non-SSL Connection)