Setting Up an IPv4/IPv6 Dual-Stack Network in a VPC
This topic describes how to create a VPC with both IPv4 and IPv6 CIDR blocks for an ECS to allow the ECS to have both IPv4 and IPv6 addresses. You can bind an EIP to the ECS and create a shared bandwidth to enable the ECS to communicate with the Internet over both IPv4 and IPv6 addresses.
- To allow users to remotely log in to ECS-A01 from the local PC (IPv4 address: 10.1.0.7; IPv6 address: 2002:20::44) and perform operations on this ECS, you need to configure the following inbound rules:
- Rules A01 and A02: allow ping traffic to ECS-A01 to test network connectivity.
- Rules A03 and A04: allow remote logins to ECS-A01 if the ECS runs Linux.
- Rules A05 and A06: allow remote logins to ECS-A01 if the ECS runs Windows.
- Rules A07 and A08: allow ECSs in the security group to communicate with each other.
- To allow ECS-A01 to access the Internet, add rules A09 and A10 to allow outbound IPv4 and IPv6 traffic.
Notes
- Only ECSs with certain flavors support IPv6. You need to select such an ECS to use an IPv4/IPv6 dual-stack network.
On the ECS console, click Create ECS. On the displayed page, check the ECS flavors. If Yes is shown in the IPv6 column, the ECS with this flavor supports IPv6.
- The network planning in this example is for your reference only. Once a VPC and subnet are created, the CIDR blocks cannot be changed. Before creating VPCs, determine how many VPCs and subnets, and what CIDR blocks or connectivity options you will need.
Procedure
Procedure | Description |
|---|---|
Create a VPC with an IPv4 CIDR block and create a subnet with IPv6 enabled in the VPC.
| |
Buy an ECS in the subnet you have created and configure security group rules for the ECS. | |
Buy an EIP and bind it to the ECS so that the ECS can communicate with the Internet using the IPv4 address. | |
Buy a shared bandwidth and add the IPv6 address of the ECS to the shared bandwidth so that the ECS can communicate with Internet using the IPv6 address. | |
To test ECS connectivity, you can:
|
Step 1: Create a VPC and Subnet
- Log in to the management console.
- Click
 in the upper left corner to display the service list and choose Networking > Virtual Private Cloud.
The Virtual Private Cloud page is displayed.
- Click Create VPC.
The Create VPC page is displayed.
- On the Create VPC page, set parameters as needed.
In this example, you need to create a VPC and subnet, and enable IPv6 for this subnet.
Table 1 VPC parameters Parameter
Example Value
Description
Region
-
The region where the VPC is created. Select the region nearest to you to ensure the lowest possible latency. The VPC, ECS, and EIP used in this example must be in the same region.
The region cannot be changed after the VPC is created.
Name
VPC-A
The VPC name.
The name can be modified after the VPC is created.
IPv4 CIDR Block
192.168.0.0/16
The IPv4 CIDR block of the VPC. You are advised to select from the following CIDR blocks:
- 10.0.0.0/8–24: The IP address ranges from 10.0.0.0 to 10.255.255.255, and the netmask ranges from 8 to 24.
- 172.16.0.0/12–24: The IP address ranges from 172.16.0.0 to 172.31.255.255, and the netmask ranges from 12 to 24.
- 192.168.0.0/16–24: The IP address ranges from 192.168.0.0 to 192.168.255.255, and the netmask ranges from 16 to 24.
The CIDR block cannot be changed after the VPC is created.
Enterprise Project
default
The enterprise project by which resources are centrally managed. Select an existing enterprise project for the VPC.
The enterprise project cannot be changed after the VPC is created.
Advanced Settings (Optional) > Tag
Not required
The tag that is used to classify and identify resources. Add tags to the VPC as required.
After the VPC is created, you can edit tags added to the VPC.
Advanced Settings (Optional) > Description
Not required
Supplementary information about the VPC. Enter a description as required.
The description can be modified after the VPC is created.
Table 2 Subnet parameters Parameter
Example Value
Description
Name
Subnet-A01
The subnet name.
The name can be modified after the subnet is created.
IPv4 CIDR Block
192.168.0.0/24
The IPv4 CIDR block of the subnet, which is a unique CIDR block with a range of IP addresses in the VPC.
The CIDR block cannot be changed after the subnet is created.
IPv6 CIDR Block (Optional)
Enabled
Whether to automatically assign an IPv6 CIDR block to the subnet.
You can enable or disable this option after the subnet is created.
Associated Route Table
Default
The default route table that the subnet is associated with. Each VPC comes with a default route table. Subnets in the VPC are then automatically associated with the default route table.
The default route table has a preset system route that allows subnets in a VPC to communicate with each other.
After the subnet is created, you can create a custom route table and associate the subnet with it.
Advanced Settings (Optional) > Gateway
192.168.0.1
The gateway address of the subnet. You are advised to retain the default address.
The gateway address cannot be changed after the subnet is created.
Advanced Settings (Optional)
- DNS Server Address
- Domain Name
Not required
The parameters that are configured for the ECS in the VPC. In this example, retain the default values or leave them blank.
You can change the values after the subnet is created.
Advanced Settings (Optional) > Tag
Not required
The tag that is used to classify and identify resources. Add tags to the subnet as required.
After the subnet is created, you can edit tags added to the subnet.
Advanced Settings (Optional) > Description
Not required
Supplementary information about the subnet. Enter a description as required.
The description can be modified after the subnet is created.
- Click Create Now.
You will be redirected to the VPC list, where you can find VPC-A you have created.
Step 2: Buy an ECS
- Click
 in the upper left corner to display the service list and choose Computing > Elastic Cloud Server.
The Elastic Cloud Server page is displayed.
- Click Create ECS.
The Create ECS page is displayed.
- On the Create ECS page, set parameters as required.
In this example, set the ECS name to ECS-A01 and configure other parameters as follows:
- Network: Select VPC-A and Subnet-A01 you have created.
Select Automatically assign IP address and Automatically-assigned IPv6 address. An IPv4 address and an IPv6 address will be assigned to ECS-A01.
- Security Group: Create security group Sg-A and add inbound and outbound rules to it. Each security group comes with system rules. You need to check and modify the rules as required to ensure that all rules in Table 3 are added.
Table 3 Sg-A rules Direction
Action
Type
Protocol & Port
Source/Destination
Description
Inbound
Allow
IPv4
TCP: 22
Source: 10.1.0.7/32
Allows the local PC (10.1.0.7/32) to remotely log in to the Linux ECS over SSH port 22 using IPv4 addresses.
Inbound
Allow
IPv4
TCP: 3389
Source: 10.1.0.7/32
Allows the local PC (10.1.0.7/32) to remotely log in to the Windows ECS over RDP port 3389 using IPv4 addresses.
Inbound
Allow
IPv4
ICMP: All
Source: 0.0.0.0/0
Allows IPv4 ping traffic to the ECS in the security group over all ICMP ports to test network connectivity.
Inbound
Allow
IPv4
All
Source: current security group (Sg-A)
Allows the ECSs in Sg-A to communicate with each other using IPv4 addresses.
Inbound
Allow
IPv6
All
Source: current security group (Sg-A)
Allows the ECSs in Sg-A to communicate with each other using IPv6 addresses.
Outbound
Allow
IPv4
All
Destination: 0.0.0.0/0
Allows the ECS in Sg-A to access the external networks using the IPv4 address.
Outbound
Allow
IPv6
All
Destination: ::/0
Allows the ECS in Sg-A to access the external networks using the IPv6 address.
- EIP: Select Not required.
- Network: Select VPC-A and Subnet-A01 you have created.
- Log in to ECS-A01 and check whether the ECS has obtained an IPv6 address.
- By default, dynamic IPv6 address assignment is enabled for Windows public images.
- Before enabling dynamic IPv6 address assignment for a Linux public image, check whether IPv6 is supported first.
Currently, all Linux public images support IPv6. By default, dynamic IPv6 address assignment is enabled for Ubuntu 16. For other Linux public images, you need to enable this function.
If an IPv6 address fails to be automatically assigned or the selected image cannot obtain an IPv6 address automatically, refer to section "Dynamically Obtaining IPv6 Addresses" in the Elastic Cloud Server User Guide. Otherwise, ECSs cannot communicate using IPv6 addresses.
Step 3: Buy an EIP and Bind It to the ECS
Buy an EIP and bind it to the ECS so that the ECS can communicate with the Internet using the IPv4 address.
- Click
 in the upper left corner to display the service list and choose Networking > Elastic IP.
The EIP list is displayed.
- Click Assign EIP.
The Assign EIP page is displayed.
- On the Assign EIP page, configure the parameters as prompted.
You can configure other EIP parameters as required. For details, see .
- In the EIP list, locate EIP-A and click Bind in the Operation column.
The Bind EIP dialog box is displayed.
- In the displayed dialog box, select ECS-A01 and click OK.
Return to the EIP list. You can see that ECS-A01 is displayed in the Associated Instance column in the EIP list.
Step 4: Buy a Shared Bandwidth and Add the ECS IPv6 Address to It
Buy a shared bandwidth and add the IPv6 address to the shared bandwidth so that the ECS can communicate with Internet.
- Click
 in the upper left corner to display the service list and choose Networking > Elastic IP.
The EIP list is displayed.
- In the navigation pane on the left, choose Shared Bandwidths and click Assign Shared Bandwidth.
The Assign Shared Bandwidth page is displayed.
- On the displayed page, set the shared bandwidth name to bandwidth-A and configure other parameters as required.
For details, see .
- Click Add Public IP Address in the Operation column.
The Add Public IP Address dialog box is displayed.
- Configure the parameters and click OK.
- Public IP Address: Select IPv6 Address.
- VPC: Select VPC-A.
- Subnet: Select Subnet-A01.
- IPv6 Address: Select the IPv6 address assigned to ECS-A01.
Step 5: Test Network Connectivity
- Use the local PC to log in to ECS-A01 using the IPv4 EIP and IPv6 address.
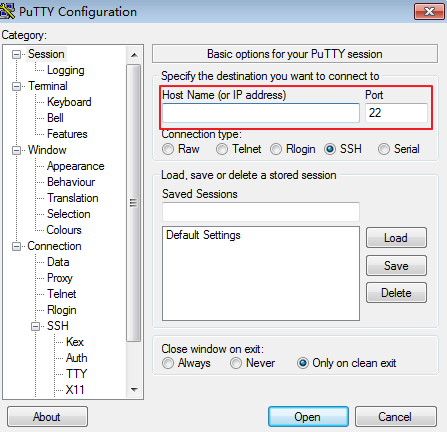
To remotely log in to ECS-A01 using PuTTY:
- Enter the EIP of ECS-A01 under Host Name (or IP address), for example, 1.95.44.XX.
- Enter the IPv6 address of ECS-A01 under Host Name (or IP address), for example, 2407:XXX:e857.
Figure 1 PuTTY configurations
- Check whether ECS-A01 can communicate with the Internet using IPv4 and IPv6 addresses.
- Check whether ECS-A01 can communicate with the Internet using the IPv4 address:
ping <IPv4-EIP or Domain-name>
- Check whether ECS-A01 can communicate with the Internet using the IPv6 address:
ping6 <IPv6-address>
In this example, 2002:20::45 is used as a public IP address. An example command is as follows:
ping6 2002:20::45
If information similar to the following is displayed, ECS-A01 can communicate with the Internet using the IPv6 address.
[root@ecs-a01 ~]# ping6 2002:20::45PING 2002:20::45(2002:20::45) from 2002:20::45 : 56 data bytes64 bytes from 2002:20::45: icmp_seq=1 ttl=64 time=0.770 ms64 bytes from 2002:20::45: icmp_seq=2 ttl=64 time=0.295 ms64 bytes from 2002:20::45: icmp_seq=3 ttl=64 time=0.245 ms^C--- 2002:20::45 ping statistics ---3 packets transmitted, 3 received, 0% packet loss, time 2080msrtt min/avg/max/mdev = 0.245/0.436/0.770/0.237 ms
- Check whether ECS-A01 can communicate with the Internet using the IPv4 address:
- Notes
- Procedure
- Step 1: Create a VPC and Subnet
- Step 2: Buy an ECS
- Step 3: Buy an EIP and Bind It to the ECS
- Step 4: Buy a Shared Bandwidth and Add the ECS IPv6 Address to It
- Step 5: Test Network Connectivity