pgAdmin is an administration and development tool for PostgreSQL. Using pgAdmin, you can connect to specific databases from your clients, create tables, and run simple and complex SQL statements. pgAdmin can be used on Windows, Linux, macOS, and other operating systems. The latest version of pgAdmin is based on the browser/server (B/S) architecture. For more information, see the pgAdmin documentation.
This section uses pgAdmin 4-4.17 as an example to describe how to use pgAdmin to connect to an RDS for PostgreSQL instance and create databases and tables.
The pgAdmin version must be 4 or later.
Connecting to an RDS for PostgreSQL Instance Using pgAdmin
- Obtain the pgAdmin installation package.
Download the pgAdmin installation package from the pgAdmin official website. The following uses pgAdmin4-4.17 as an example.
- Double-click the installation package and complete the installation as instructed.
- Start the pgAdmin client after the installation.
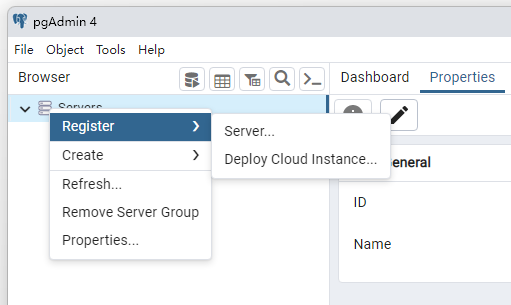
- In the displayed login window, right-click Servers and choose Register > Server from the shortcut menu.
Figure 1 Login information
- On the General page, specify Name. On the Connection page, specify information about the DB instance to be connected. Then, click Save.
Figure 2 Entering basic information
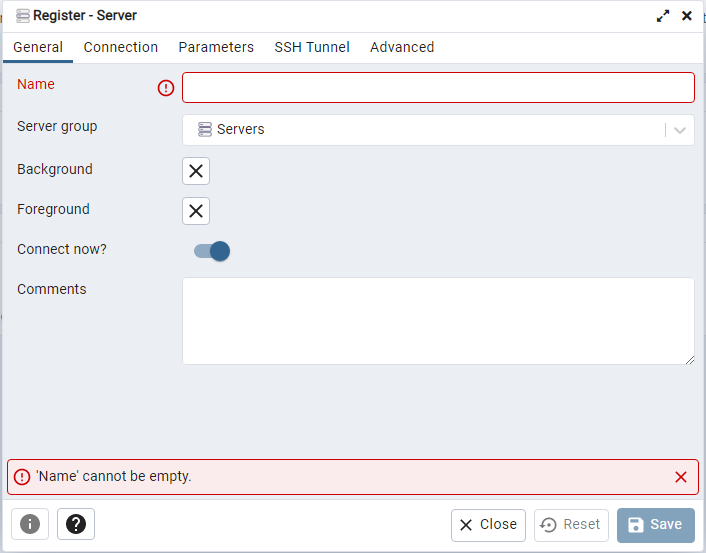
Figure 3 Entering connection information
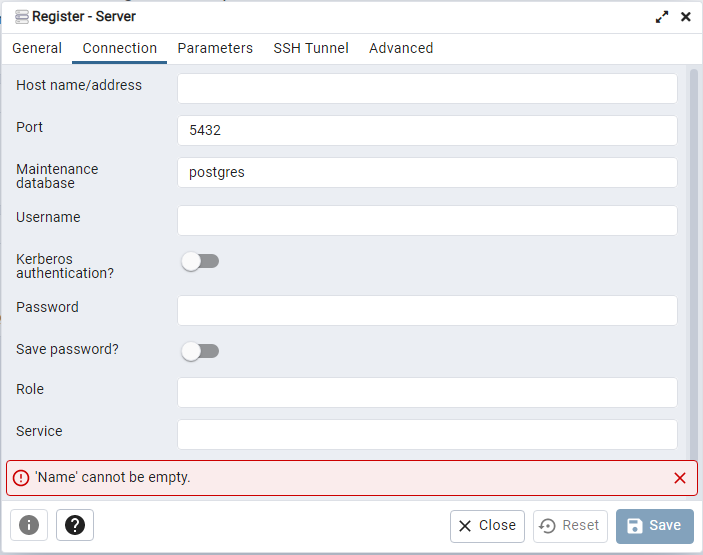
Parameter description:
- Host name/address: indicates the EIP bound to the target DB instance.
- Port: indicates the database port. By default, the value is 5432.
- Username: indicates the username. By default, the value is root.
- Password: indicates the password of the target database username.
- In the login window, check that the connection information is correct. The target DB instance is successfully connected.
Basic Database Operations
Creating a database
- In the navigation pane on the left of pgAdmin, right-click the target instance node and choose Create > Database from the shortcut menu.
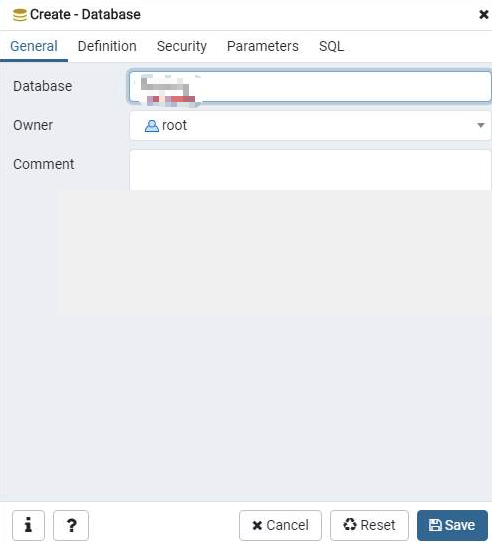
- On the General tab, specify Database and click Save.
Figure 4 Creating a database
Creating a table
- Access the created database. In the navigation pane on the left, right-click Tables and choose Create > Table from the shortcut menu.Note
Create tables in the schema of the database created by the current user.
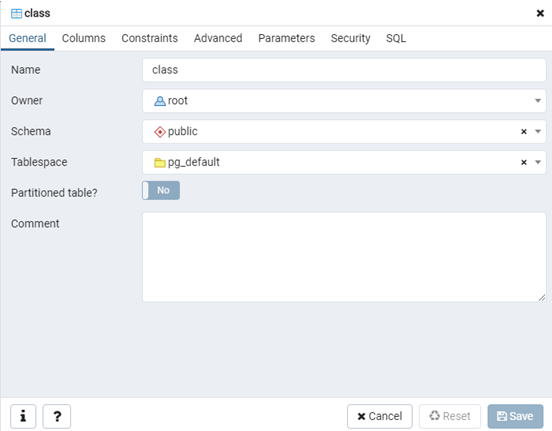
- On the General tab, enter required information and click Save.
Figure 5 Basic information
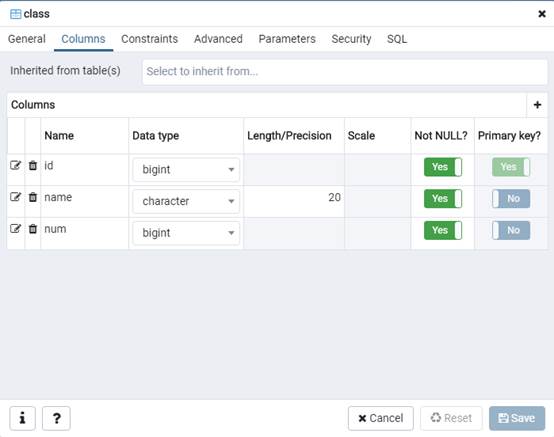
- On the Columns tab, add table columns and click Save.
Figure 6 Adding table columns
Running SQL statements
On the top menu bar, choose Tools > Query Tool. The SQL CLI is displayed.
Take care when adding, deleting, or modifying data in the instance. Improper operations can cause instance or service exceptions.
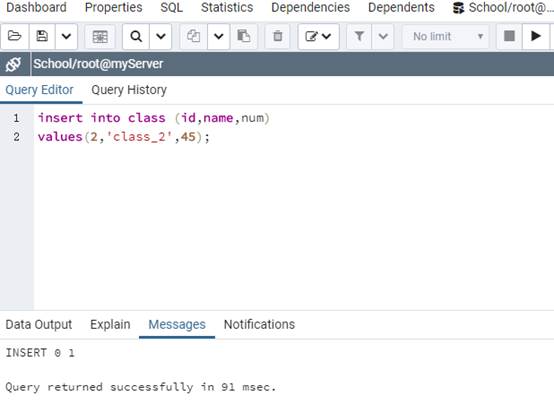
- Enter an INSERT command and click Execute to insert data into the table.
Figure 7 Inserting data
- Enter a SELECT command and click Execute to query data in the table.
Figure 8 Querying data

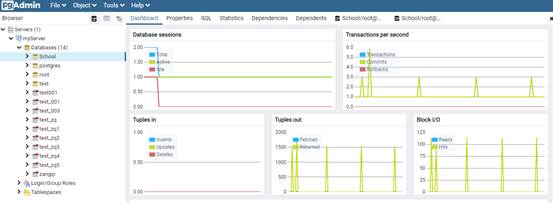
Viewing metrics
From the navigation pane on the left, choose a database. In the right pane, click the Dashboard tab to view database metrics, including Database sessions, Transactions per second, Tuples in, Tuples out, and Block I/O.
Figure 9 Viewing metrics
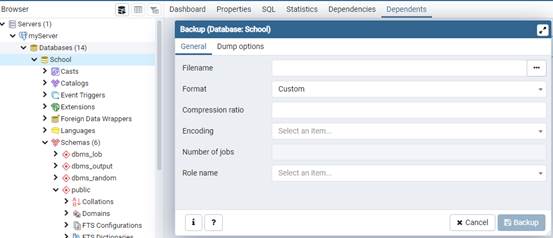
Backing up data
- In the navigation pane on the left, right-click the database to be backed up and choose Backup from the shortcut menu.
- On the General tab page of the displayed dialog box, specify required information and click Backup.
Figure 10 Backing up data
Restoring data
- In the navigation pane on the left, right-click the database to be restored and choose Restore from the shortcut menu.
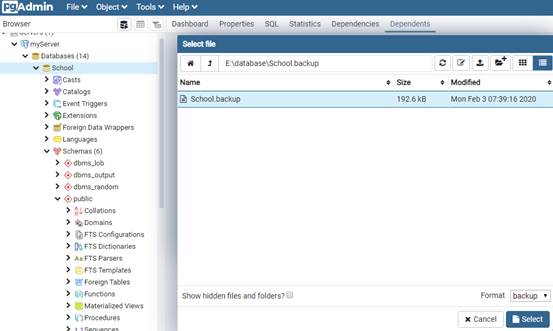
- In the displayed dialog box, select the backup file and click Restore.
Figure 11 Restoring data
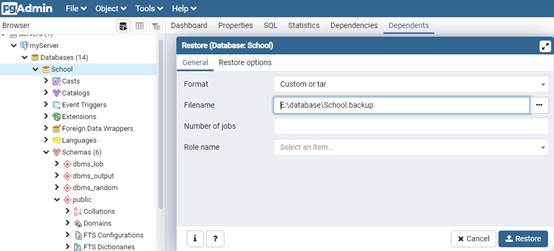
Figure 12 Restoration completed