Restoring Data to a Self-Managed MySQL Database
Scenarios
You can download backup files by referring to Downloading a Backup File and restore data from them.
Backup data cannot be restored to local databases that run the Windows operating system.
Only x86 packages of the open-source backup tool XtraBackup are supported. Therefore, you are advised to restore backup data to self-managed databases on Arm-based ECSs by migrating data with Data Replication Service (DRS) or exporting and importing data. For details, see Database Migration.
Prerequisites
When you restore data from backup files to self-managed MySQL databases, ensure that the target MySQL version is later than or equal to the original MySQL version.
During data restoration, run the following command to view the restoration process:
ps -ef | grep mysql
Procedure
- Download the qpress RPM file qpress-11-1.el7.x86_64.rpm. Enterprise Linux 7 (including CentOS 7, RHEL 7, Rocky Linux 7, and AlmaLinux 7) is used as an example.
For details about RPM files of other OSs, see https://repo.percona.com/yum/release/.
- Upload the qpress RPM file to the ECS.
- Install qpress on the ECS.
rpm -ivh qpress-11-1.el7.x86_64.rpm
- Download XtraBackup from the website, for example, percona-xtrabackup-24-2.4.9-1.el7.x86_64.rpm.Notice
- For MySQL 5.6 and 5.7, download XtraBackup 2.4.9 or later.
- For MySQL 8.0, download XtraBackup 8.0.*.
- Upload XtraBackup to the ECS.
- Install XtraBackup on the ECS.
rpm -ivh percona-xtrabackup-24-2.4.9-1.el7.x86_64.rpm --nodeps --force
- On the ECS, decompress the full backup file that has been downloaded.
- Create a temporary directory, for example, mysqlbackup.
mkdir mysqlbackup
- Decompress the file to the temporary directory.
- For MySQL 5.6 and 5.7:
xbstream -x -p 4 < ./Full_backup_file.qp -C ./mysqlbackup/
innobackupex --parallel 4 --decompress ./mysqlbackup
- For MySQL 8.0:
xbstream -x -p 4 < ./Full_backup_file.qp -C ./mysqlbackup/
xtrabackup --parallel 4 --decompress --target-dir=./mysqlbackup
- For MySQL 5.6 and 5.7:
- Delete the .qp backup file.
find ./mysqlbackup/ -name '*.qp' | xargs rm -f
- Create a temporary directory, for example, mysqlbackup.
- Apply the log.
- For MySQL 5.6 and 5.7, run innobackupex --apply-log ./mysqlbackup.
- For MySQL 8.0, run xtrabackup --prepare --target-dir=./mysqlbackup.
- Back up data.
- Stop MySQL database services.
service mysql stop
NoteFor MySQL 5.7, run the following command to stop MySQL database services:
/bin/systemctl stop mysqld.service
- Back up the original database directory.
mv /var/lib/mysql/data/var/lib/mysql/data_bak
- Create a new database directory and change the permissions.
mkdir /var/lib/mysql/data
chown mysql:mysql /var/lib/mysql/data
- Stop MySQL database services.
- Copy the full backup file and change directory permissions.
- For MySQL 5.6 and 5.7, run innobackupex --defaults-file=/etc/my.cnf --copy-back ./mysqlbackup.
- For MySQL 8.0, run xtrabackup --defaults-file=/etc/my.cnf --copy-back --target-dir=./mysqlbackup.
chown -R mysql:mysql /var/lib/mysql/data
- Start the self-managed MySQL server.
service mysql start
Note- For MySQL 5.7, run /bin/systemctl start mysqld.service to start the MySQL server.
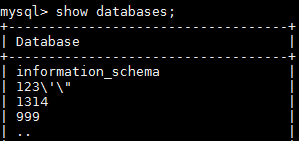
- Log in to the database and view the restoration result.
mysql -u root
show databases
Figure 1 Viewing the restoration result
 Note
NoteIf you forget the password, shut down the server. Add skip_grant_tables=ON to the my.cnf file and restart the server. In this way, you can log in to the database without entering the password. After the login, you need to reset the password.
After the password is reset, shut down the server again, delete skip_grant_tables=ON from the my.cnf file, and restart the server.
- If you need to upgrade the server to a higher community version, perform the following operations to delete the following stored procedures from the self-managed database after the restoration is complete to avoid compatibility issues:
- Log in as user rdsAdmin without a password by referring to 12. Run the following command to grant privileges to user root:GRANT ALL PRIVILEGES ON *.* TO 'root'@'%' WITH GRANT OPTION;
- Log in as user root and do as follows:use mysql;DROP PROCEDURE IF EXISTS rebuild_sql_filter_rules;DROP PROCEDURE IF EXISTS add_sql_filter;DROP PROCEDURE IF EXISTS add_sql_select_filter;DROP PROCEDURE IF EXISTS add_sql_update_filter;DROP PROCEDURE IF EXISTS add_sql_delete_filter;DROP PROCEDURE IF EXISTS add_sql_insert_filter;DROP PROCEDURE IF EXISTS drop_sql_filter;DROP PROCEDURE IF EXISTS drop_sql_select_filter;DROP PROCEDURE IF EXISTS drop_sql_update_filter;DROP PROCEDURE IF EXISTS drop_sql_delete_filter;DROP PROCEDURE IF EXISTS drop_sql_insert_filter;DROP PROCEDURE IF EXISTS add_index_hint;DROP PROCEDURE IF EXISTS drop_index_hint;DROP PROCEDURE IF EXISTS drop_index_hints;
- Log in as user rdsAdmin without a password by referring to 12. Run the following command to grant privileges to user root:
- Scenarios
- Prerequisites
- Procedure