Scenarios
After obtaining the account name from a tenant (if the tenant is a multi-project user, you also need to obtain the project name), you can share specified private images with the tenant. You can share a single image or multiple images as needed.
Prerequisites
- You have obtained the account name of the target tenant. (If the tenant is a multi-project user, you also need to obtain the project name.)
- Before sharing an image, ensure that any sensitive data has been deleted from the image.
Procedure
- Share multiple images.
- Log in to the management console.
- Under Computing, click Image Management Service.
- Click the Private Images tab.
- Select the private images to share and click Share above the image list.
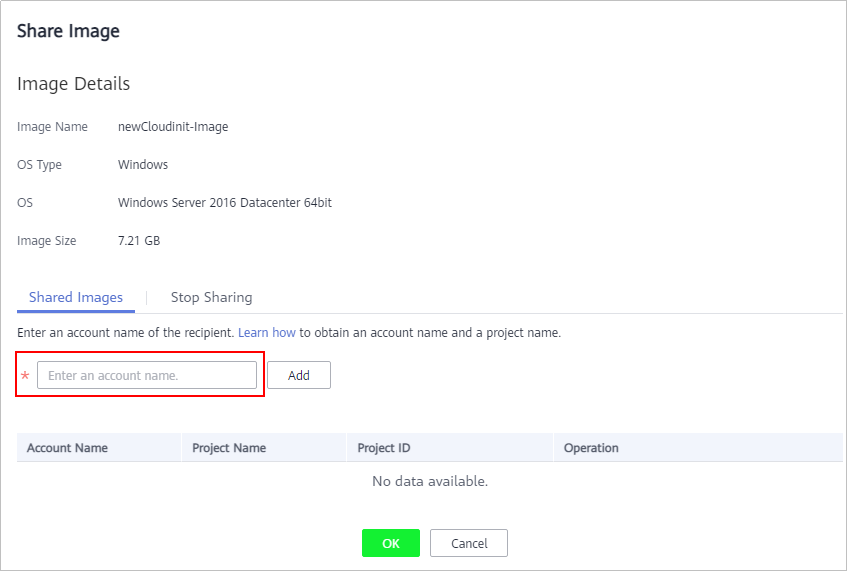
- In the Share Image dialog box, enter the account name of the target tenant and click Add. If the tenant is a multi-project user, you also need to select the project name.
To add multiple target tenants, enter their account names (and project names) and then click Add.
- Click OK.
- Share a single image.
- Log in to the management console.
- Under Computing, click Image Management Service.
- Click the Private Images tab.
- Locate the row that contains the private image you are to share, click More in the Operation column, and select Share from the drop-down list.
- In the Share Image dialog box, enter the account name of the target tenant and click Add. If the tenant is a multi-project user, you also need to select the project name.
To add multiple target tenants, enter their account names (and project names) and then click Add.
Figure 1 Sharing an image

- Click OK.
Related Operations
After you share images with a tenant, the tenant can accept the shared images on the Images Shared with Me page on the IMS console. For details, see Accepting or Rejecting Shared Images.
Parent topic: Sharing Images