Cloud-Init Configuration FAQ
How Do I Change the Hostname of a Cloud Server?
The static hostname of a Linux cloud server is user defined and injected using Cloud-Init during the cloud server creation. You can run a hostname command to change the hostname. Assume that the new hostname is zt.cloud-init.test.
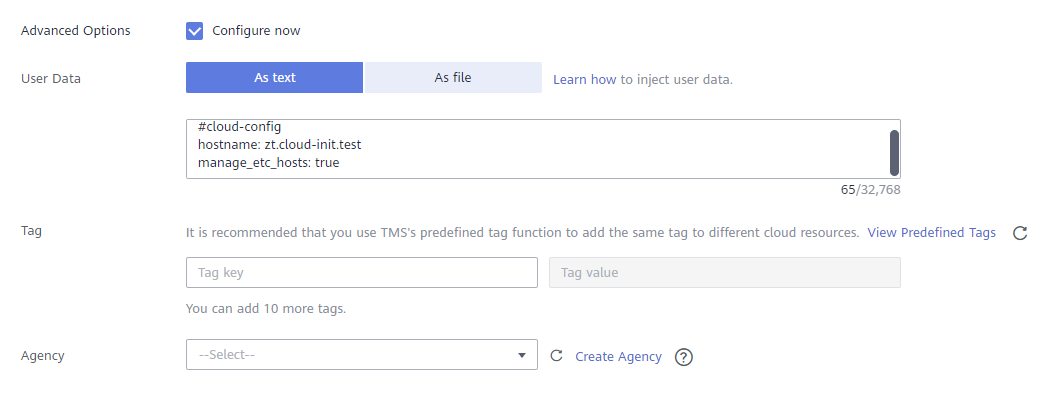
- When creating a cloud server, in the Advanced Options area, click Configure now and paste the following content to the User Data text box:
#cloud-config
hostname: zt.cloud-init.test
manage_etc_hosts: true
 Note
NoteCloud-Init can read only the data starting with #cloud-config.
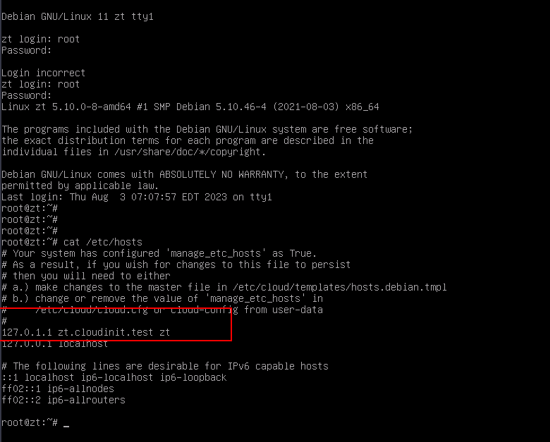
- Log in to the cloud server and run the following command to check whether the hostname has been changed:
cat /etc/hosts
If the new hostname (zt.cloud-init.test) is displayed in the command output, the hostname has been changed.
How Do I Configure an SSH Key for a Cloud Server and Use Cloud-Init to Add a User?
If you want to use an SSH key pair instead of a password for more secure remote login, you can use a Cloud-Init script to add the key pair to the ~/.ssh/authorized_keys file. The procedure is as follows:
- Remotely log in to the cloud server in SSH mode.
vim /etc/ssh/sshd_config
PasswordAuthentication: yes
- Generate a key pair.
ssh-keygen -t rsa -f ~/.ssh/id_rsa -P
cat ~/.ssh/id_rsa.pub
Example:
#cloud-configusers:- default- name: myadminusergroups: sudoshell: /bin/bashsudo: ['ALL=(ALL) NOPASSWD:ALL']ssh-authorized-keys:- ssh-rsa Public key (for example, ~/.ssh/id_rsa.pub)Note- If the #cloud-config script contains the - default parameter, the new user will be added to the administrator list.
- If the #cloud-config script does not contain the - default parameter, the new user will overwrite the original administrator.
- Log in to the cloud server in SSH mode.
ssh <user>@<publicIpAddress>
- Open the /etc/group file and check whether the user is added to the cloud server and the specified user group:
cat /etc/group
- If the following information is displayed, the user in the cloud_init_add_user.txt file has been added to the cloud server and the specified user group:
root:x:0:
<snip />
sudo:x:27:myadminuser
How Do I Create a Swap Partition?
Cloud-Init can be used to create swap partitions in Linux distributions. Conventionally, swap partitions are configured by the Linux agent (WALA) for different distributions. The following describes how to use Cloud-Init to create a swap partition.
- Use Cloud-Init to create two partitions on a temporary disk. The first partition occupies 66% of the disk space. By default, it is an ext4 partition and is mounted to /mnt. The second partition is a swap partition, which occupies the remaining disk space and takes effect when the cloud server is started.#cloud-configdisk_setup: # Disk settingsephemeral0:table_type: mbr (mbr or gpt)layout: [66, [33, 82]] # 82 indicates the disk type of a swap partition.overwrite: Truefs_setup: # Configure a file system on the partition.- device: ephemeral0.1filesystem: ext4- device: ephemeral0.2filesystem: swapmounts: # Use the first partition as ext4 and the second as swap.- ["ephemeral0.1", "/mnt"]- ["ephemeral0.2", "none", "swap", "sw", "0", "0"]
- Check whether the swap partition is successfully created.
swapon -s
If the following information is displayed, the swap partition is successfully created:

- How Do I Change the Hostname of a Cloud Server?
- How Do I Configure an SSH Key for a Cloud Server and Use Cloud-Init to Add a User?
- How Do I Create a Swap Partition?