After creating an RDS for PostgreSQL instance, you can connect to it from a Linux ECS with a PostgreSQL client installed over a public network.
You can use the PostgreSQL client psql to connect to your DB instance over a Secure Sockets Layer (SSL) connection. SSL encrypts connections to your DB instance, making in-transit data more secure.
SSL is enabled by default when you create an RDS for PostgreSQL DB instance and cannot be disabled after the instance is created.
Enabling SSL reduces the read-only and read/write performance of your instance by about 20%.
You can also access your DB instance through Network Address Translation (NAT). If you have configured both NAT and EIP, the EIP is preferentially used.
Step 1: Create an ECS
- Log in to the management console and check whether there is an ECS available.
- Create an ECS and select Linux (for example, CentOS) as its OS.
To download a PostgreSQL client to the ECS, bind an EIP to the ECS.
For details about how to purchase a Linux ECS, see "Purchasing an ECS" in Elastic Cloud Server User Guide.
- On the ECS Information page, view the region and VPC of the ECS.
- On the Basic Information page of the RDS for PostgreSQL instance, view its region and VPC.
Step 2: Test Connectivity and Install a PostgreSQL Client
- Log in to the ECS. For details, see "Logging In to a Linux ECS Using VNC" in Elastic Cloud Server User Guide.
- On the Instances page of the RDS console, click the DB instance name to go to the Basic Information page.
- Choose Connectivity & Security from the navigation pane. In the Connection Information area, obtain the EIP and database port of the DB instance.
- On the ECS, check whether the EIP and port of the RDS for PostgreSQL instance can be connected.curl -kv curl -kv EIP : :5432
- If yes, network connectivity is normal.
- If no, check the security group rules.
- If the ECS security group lacks an outbound rule with Destination set to 0.0.0.0/0 and Protocol & Port set to All, add an outbound rule for the DB instance's floating IP address and port.
- If in the security group of the DB instance, there is no inbound rule allowing the access from the private IP address and port of the ECS, add an inbound rule for the private IP address and port of the ECS. For details, see Configuring Security Group Rules.
- Install a PostgreSQL client.
- Installing a PostgreSQL Client (PostgreSQL 15 or Earlier)
The PostgreSQL community provides client installation methods for different OSs. You can download and install the client using the installation tool of the OS. This installation method is simple but can be used only for the OSs supported by the PostgreSQL community. In this example, CentOS 7 is used. Use the default installation tool of the OS to install a client (PostgreSQL 15 or earlier).
Figure 1 Obtaining the installation tool
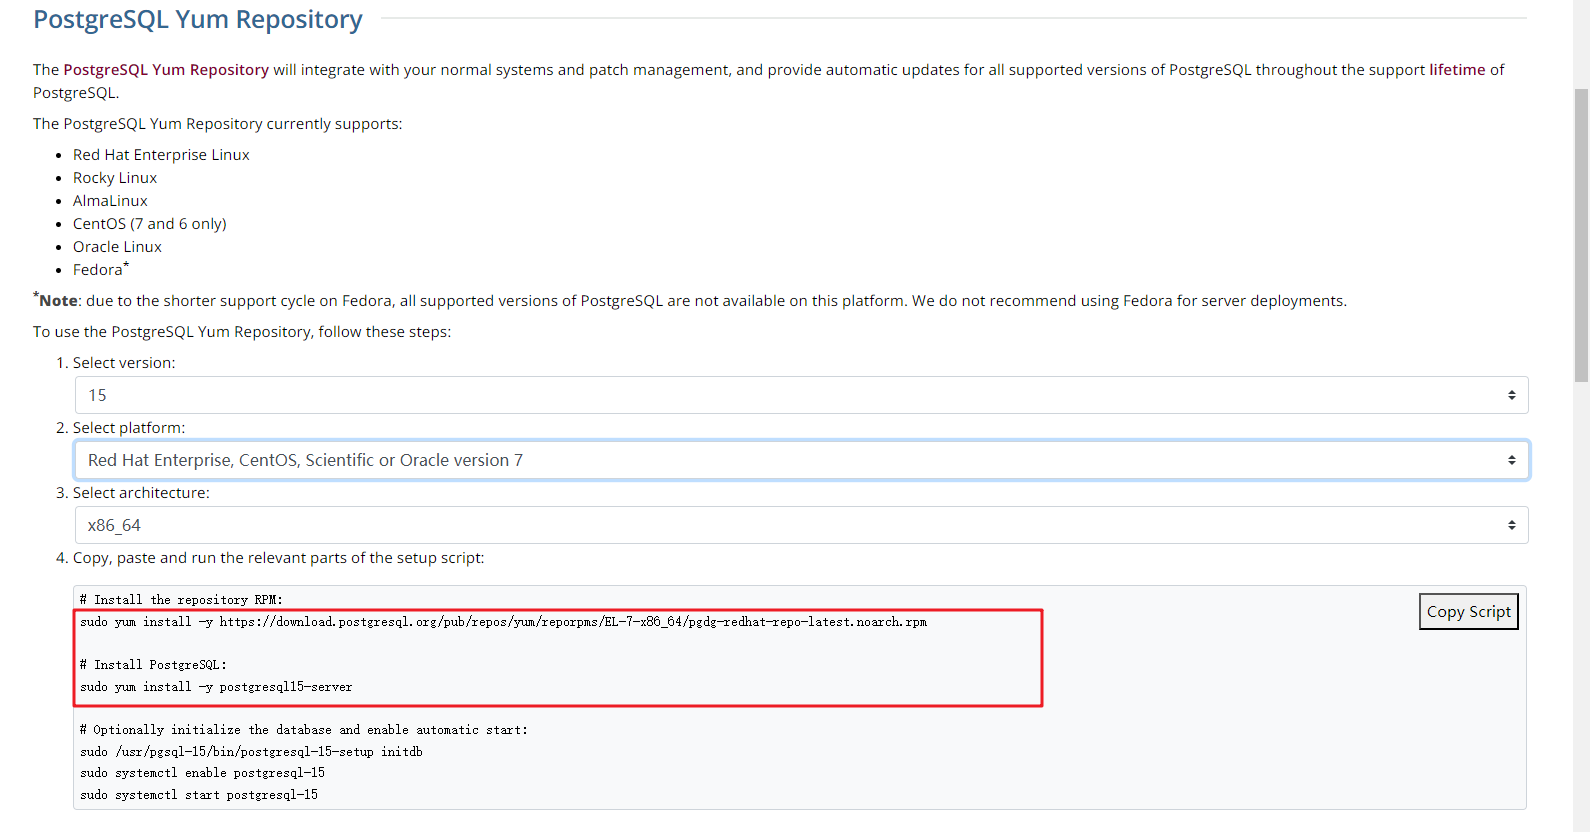 sudo yum install -y https://download.postgresql.org/pub/repos/yum/reporpms/EL-7-x86_64/pgdg-redhat-repo-latest.noarch.rpmsudo yum install -y postgresql15-server
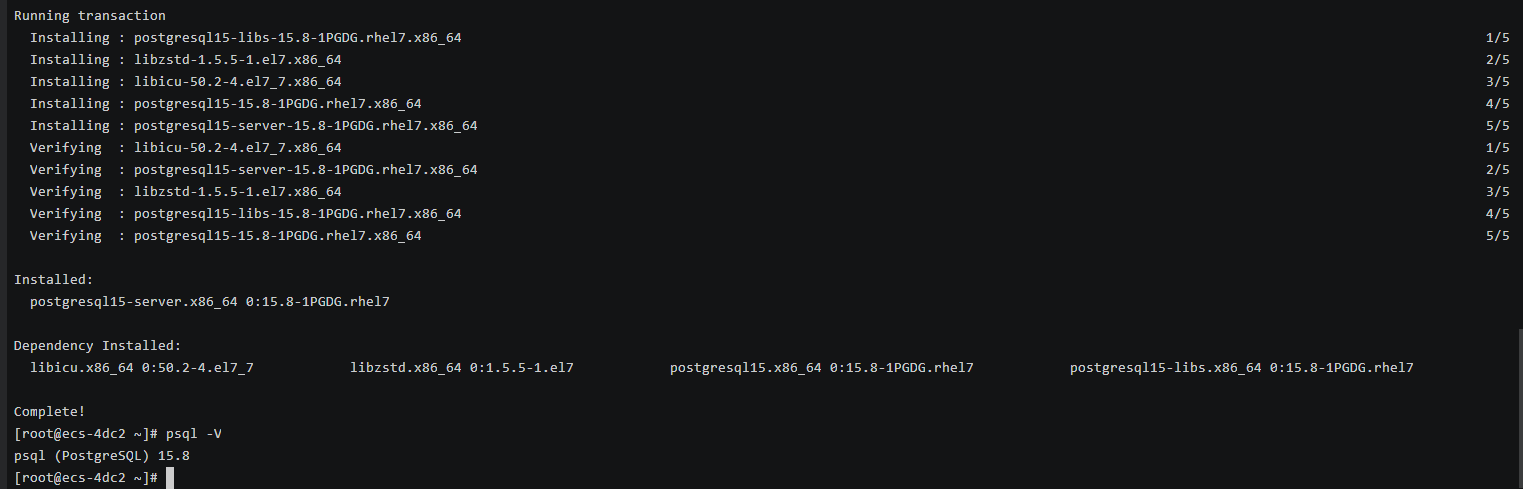
Check whether the installation is successful.
psql -VFigure 2 Successful installation
- Installing a PostgreSQL Client (No Restrictions on PostgreSQL Versions)
Installation from source code: This installation method has no restrictions on RDS for PostgreSQL instance versions and ECS OS types.
The following uses an ECS using the EulerOS image as an example to describe how to install a PostgreSQL 16.4 client.
- To use SSL, download OpenSSL to the ECS in advance.sudo yum install -y openssl-devel
- Obtain the code download link, run wget to download the installation package to the ECS, or download the installation package to the local PC and then upload it to the ECS.wget https://ftp.postgresql.org/pub/source/v16.4/postgresql-16.4.tar.gz
- Decompress the installation package.tar xf postgresql-16.4.tar.gz
- Compile the code and then install the client.cd postgresql-16.4./configure --without-icu --without-readline --without-zlib --with-opensslmake -j 8 && make installNote
If --prefix is not specified, the default path is /usr/local/pgsql. The client can be installed in the simplest way.
Figure 3 Compilation and installation

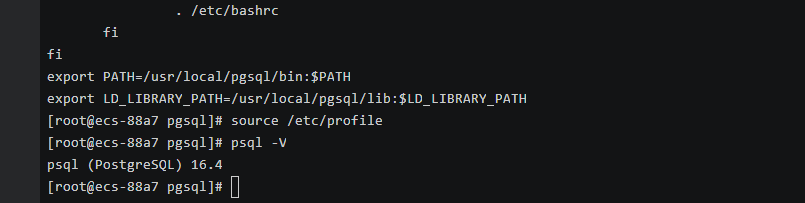
- Add the following code to the /etc/profile file to configure environment variables:export PATH=/usr/local/pgsql/bin:$PATHexport LD_LIBRARY_PATH=/usr/local/pgsql/lib:$LD_LIBRARY_PATHsource /etc/profile
- Test whether the psql is available.psql -V
Figure 4 Testing psql
- To use SSL, download OpenSSL to the ECS in advance.
- Installing a PostgreSQL Client (PostgreSQL 15 or Earlier)
Step 3: Connect to the DB Instance Using a CLI (SSL Connection)
- On the Instances page of the RDS console, click the DB instance name to go to the Basic Information page.
- In the navigation pane, choose Connectivity & Security.
- In the Connection Information area, find the SSL field and click
 to download the package Certificate Download.zip. Then, extract the root certificate ca.pem and bundle ca-bundle.pem from the package.
 - Upload ca.pem to the ECS.
- Run the following command on the ECS to connect to the RDS for PostgreSQL instance:
psql --no-readline -h <host> -p <port> "dbname=<database> user=<user> sslmode=verify-ca sslrootcert=<ca-file-directory>"
Example:
psql --no-readline -h 192.168.0.7 -p 5432 "dbname=postgres user=root sslmode=verify-ca sslrootcert=/root/ca.pem"
Table 1 Parameters Parameter
Description
<host>
<port>
<database>
Name of the database to be connected. The default database name is postgres.
<user>
Enter the administrator account root.
<ca-file-directory>
Directory of the CA certificate used for the SSL connection. This certificate should be stored in the directory where the command is executed.
sslmode
SSL connection mode. Set it to verify-ca to use a CA to check whether the service is trusted.
- Enter the password of the database account as prompted.Password:
If the following information is displayed, the connection is successful.
SSL connection (protocol: TLSv1.2, cipher: ECDHE-RSA-AES256-GCM-SHA384, bits: 256, compression: off)