After buying an RDS for PostgreSQL instance, you can connect to it from a Linux ECS with a PostgreSQL client installed over a private network.
You can connect to a DB instance using a PostgreSQL client using SSL. SSL encrypts connections to your DB instance, making in-transit data more secure.
SSL is enabled by default when you create an RDS for PostgreSQL DB instance and cannot be disabled after the instance is created.
Enabling SSL reduces the read-only and read/write performance of your instance by about 20%. For details, see Impact of SSL Encryption on Database Performance.
Operation Process
Process | Description |
|---|---|
Create and configure a DB instance. | |
If you want to use a PostgreSQL client to connect to a DB instance, you need to prepare a server, install the PostgreSQL client on the server, and run the connection command. Create a Linux ECS that is in the same region and VPC as your DB instance. | |
Test the network connectivity between the ECS and the floating IP address and port of the RDS for PostgreSQL instance, and install a PostgreSQL client on the ECS. | |
Step 4: Connect to the DB Instance Using a CLI (SSL Connection) | Use a command-line interface (CLI) to connect to the RDS for PostgreSQL instance using the floating IP address and port. |
Step 1: Buy an RDS for PostgreSQL Instance
- Log in to the management console.
- Click
 in the upper left corner and select a region and a project.
 - Click
 in the upper left corner of the page and choose Database > Relational Database Service.
 - On the Instances page, click Buy DB Instance.
- On the Buy DB Instance page, set instance information and click Buy Now.
- Basic information
Table 1 Basic information Parameter
Description
Region
Region where your resources are located.
NOTE:Products in different regions cannot communicate with each other through a private network. After a DB instance is created, the region cannot be changed. Therefore, exercise caution when selecting a region.
DB Instance Name
Different DB instances can have the same name. The instance name must start with a letter and consist of 4 to 64 characters. Only letters (case-sensitive), digits, hyphens (-), and underscores (_) are allowed.
DB Engine
PostgreSQL
DB Engine Version
Supported DB engine versions may vary by region. For the actual options, see them on the console.
When creating an RDS for PostgreSQL instance, select an appropriate DB engine version tailored to your workloads. You are advised to select the latest available version because it is more stable, reliable, and secure.
DB Instance Type
- Primary/Standby: uses an HA architecture with a primary DB instance and a synchronous standby DB instance. It is suitable for production databases of large- and medium-sized enterprises in Internet, Internet of Things (IoT), retail e-commerce sales, logistics, gaming, and other sectors. When a primary instance is being created, a standby instance is provisioned along with it to provide data redundancy. The standby instance is invisible to you after being created.
- Single: uses a standalone architecture, which is less expensive than primary/standby DB instances. It is recommended for development and testing of microsites, and small and medium enterprises, or for learning about RDS.
AZ
An AZ is a physical region where resources use independent power supplies and networks. AZs are physically isolated but interconnected through an internal network.
You can deploy your primary and standby instances in a single AZ or across AZs to implement failover and high availability.
Time Zone
Select a time zone based on the region your instance will be hosted in.
- Instance class and storage
Table 2 Instance class and storage Parameter
Description
Instance Class
Refers to the vCPUs and memory of a DB instance. Different instance classes support different numbers of database connections and maximum IOPS.
After a DB instance is created, you can change its instance class. For details, see Changing a DB Instance Class.
Storage Type
Determines the instance read/write speed. A higher maximum throughput enables faster I/O operations.
Ultra-high I/O: uses the SSD disk type that supports a maximum throughput of 350 MB/s.
Extreme SSD: uses 25GE network and RDMA technologies to provide you with up to 1,000 MB/s throughput per disk and sub-millisecond latency.
High I/O: supports a maximum throughput of 150 MB/s.
Storage Space
Contains the system overhead required for inodes, reserved blocks, and database operation. Storage can range from 40 GB to 4,000 GB and the selected size must be an integer multiple of 10 GB.
After a DB instance is created, you can scale up its storage space. For details, see Scaling Storage Space.
Disk Encryption
- If you keep this option deselected, disk encryption is disabled.
- If you select this option, disk encryption is enabled. Enabling disk encryption improves security but affects system performance.
If you select this option, the Key Name parameter appears. Select an existing key or create a new one as the tenant key.
- After disk encryption is enabled, the following restrictions apply:
- If you enable disk encryption during instance creation, the disk encryption status and the key cannot be changed later.
- Disk encryption does not encrypt backup data stored in Object Storage Service (OBS) buckets.
- Keep the key secure. Once the key is disabled, deleted, or frozen, your instance will be inaccessible and its data may not be restored.
- Network and database configurations
Table 3 Network Parameter
Description
VPC
A virtual network in which your RDS instances are located. A VPC can isolate networks for different workloads. You can select an existing VPC or create a VPC.
If no VPC is available, RDS allocates a VPC to you by default.
NOTICE:After a DB instance is created, the VPC cannot be changed.
Subnet
Improves network security by providing dedicated network resources that are logically isolated from other networks. Subnets are only valid within a specific AZ. Dynamic Host Configuration Protocol (DHCP) is enabled by default for subnets where you plan to create RDS instances and cannot be disabled.
IPv4 address:
A floating IPv4 address is automatically assigned when you create a DB instance. You can also enter an unused floating IPv4 address in the subnet CIDR block. After the DB instance is created, you can change the floating IP address.
Security Group
A security group controls network traffic for both inbound and outbound directions and restricts access by port. By default, the security group associated with the RDS instance is authorized.
Security groups enhance security by controlling access to RDS from other services. Ensure that the security group you select allows the client to access the DB instance.
If no security group is available, RDS allocates a security group to you by default.
Table 4 Database configuration Parameter
Description
Administrator
The default login name for the database is root.
Administrator Password
The password must consist of 8 to 32 characters and contain at least three of the following: uppercase letters, lowercase letters, digits, and the following special characters: ~ ! @ # $ % ^ * - _ = + ? ,
Enter a strong password and periodically change it for security reasons.
If the password you provide is considered weak by the system, you will be prompted to provide a stronger password.
Keep this password secure. The system cannot retrieve it.
After a DB instance is created, you can reset this password. For details, see Resetting the Administrator Password.
Confirm Password
Must be the same as Administrator Password.
Parameter Template
Contains engine configuration values that can be applied to one or more DB instances of the same DB engine. If you intend to create a primary/standby DB pair, they use the same parameter template. You can modify the instance parameters as required after the DB instance is created.
NOTICE:If you use a custom parameter template when creating a DB instance, the following specification-related parameters in the custom template are not delivered. Instead, the default values are used.
- maintenance_work_mem
- shared_buffers
- max_connections
- effective_cache_size
After an instance is created, you can adjust its parameters as needed. For details, see Modifying Parameters of an RDS for PostgreSQL Instance.
Enterprise Project
If your account has been associated with an enterprise project, select the target project from the Enterprise Project drop-down list.
- Tags
Table 5 Tags Parameter
Description
Tag
Tags an RDS instance. This parameter is optional. Adding tags to RDS instances helps you better identify and manage the instances. Up to 20 tags can be added for each instance.
After a DB instance is created, you can view its tag details on the Tags page. For details, see Managing Tags.
- Batch creation
Table 6 Batch creation Parameter
Description
Quantity
RDS supports DB instance creation in batches. If you choose to create primary/standby DB instances and set Quantity to 1, a primary DB instance and a standby DB instance will be created synchronously.
If you create multiple DB instances at a time, their names will include a four-digit suffix. For example, if you specify instance here, the names will be instance-0001, instance-0002, and so on. If existing instances' suffixes have already reached up to 0010, the new instance names will start from instance-0011.
NoteThe performance of your RDS instance depends on its configurations. The hardware configuration items you can choose include the instance class, storage type, and storage space.
- Basic information
- Confirm the specifications.
- If you need to modify your settings, click Previous.
- If you do not need to modify your settings, click Submit.
- To view and manage your RDS instance, go to the Instances page.
- When your DB instance is being created, the status is Creating. The status changes to Available after the instance is created.
- An automated backup policy is enabled by default. You can change it after the RDS instance is created. The system automatically creates a full backup once an instance is created.
- The default database port is 5432. You can change it after a DB instance is created.
For details, see Changing a Database Port.
Step 2: Create an ECS
- Log in to the management console and check whether there is an ECS available.
- If there is a Linux ECS, go to 2.
- If there is not a Linux ECS, create an ECS and select Linux (for example, CentOS 7) as its OS.
To install a PostgreSQL client to the ECS, bind an EIP to the ECS and ensure that the ECS is in the same region, VPC, and security group as the RDS for PostgreSQL instance for seamless communication.
For details about how to purchase a Linux ECS, see "Purchasing an ECS" in Elastic Cloud Server User Guide.
- Check whether the ECS and RDS for PostgreSQL instance are in the same region and VPC.
- If they are in different regions, create another ECS. The ECS and DB instance in different regions cannot communicate with each other. To reduce network latency, deploy your DB instance in the region nearest to your workloads.
- If they are in different VPCs, change the VPC settings of the ECS. For details, see "Changing a VPC" in Elastic Cloud Server User Guide.
Step 3: Test Connectivity and Install a PostgreSQL Client
Method 1: Installing a PostgreSQL Client (PostgreSQL 15 or Earlier)
- Log in to the ECS. For details, see "Logging In to a Linux ECS Using VNC" in Elastic Cloud Server User Guide.
- On the Instances page of the RDS console, click the DB instance name to go to the Basic Information page.
- Choose Connectivity & Security from the navigation pane. In the Connection Information area, obtain the floating IP address and database port of the DB instance.
- On the ECS, check whether the floating IP address and database port of the RDS for PostgreSQL instance can be connected.curl -kv 192.168.0.7 : 5432
- If yes, network connectivity is normal.
- If no, check the security group rules.
- Check the outbound rules of the ECS security group. If the destination address is not 0.0.0.0/0 and the protocol & port is not All, add an outbound rule that contains the RDS instance's floating IP address and port.
- Check the inbound rules of the RDS security group. Add an inbound rule that contains the ECS's private IP address and port. For details, see Configuring Security Group Rules.
- Install a PostgreSQL client.
The PostgreSQL community provides client installation methods for different OSs. You can download and install the client using the installation tool of the OS. This installation method is simple but can be used only for the OSs supported by the PostgreSQL community.
In this example, CentOS 7 is used. Use the default installation tool of the OS to install a client (PostgreSQL 15 or earlier).
Figure 1 Obtaining the installation tool
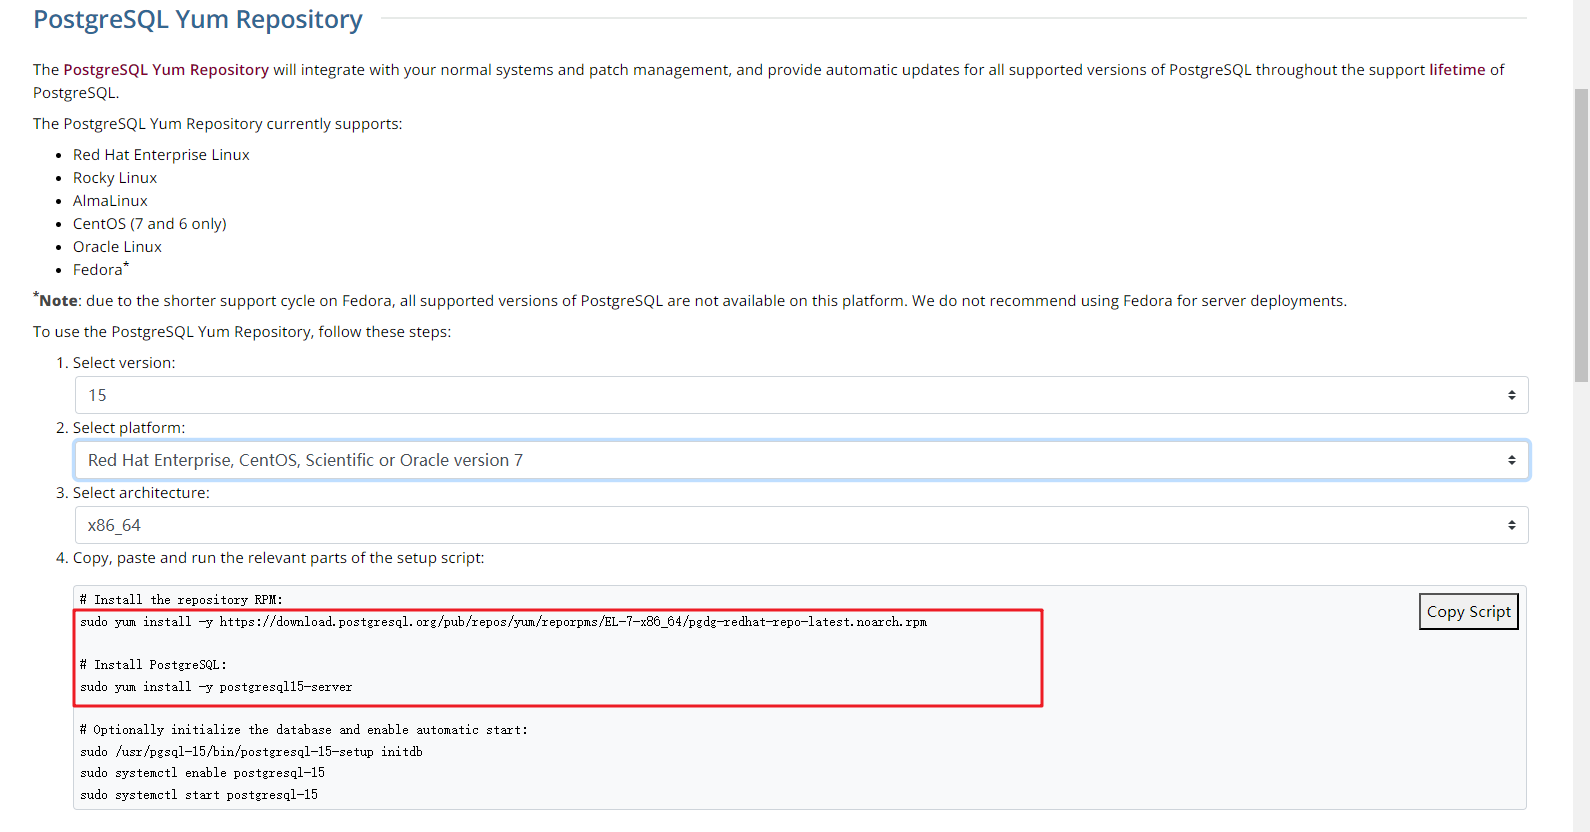
Run the installation commands:
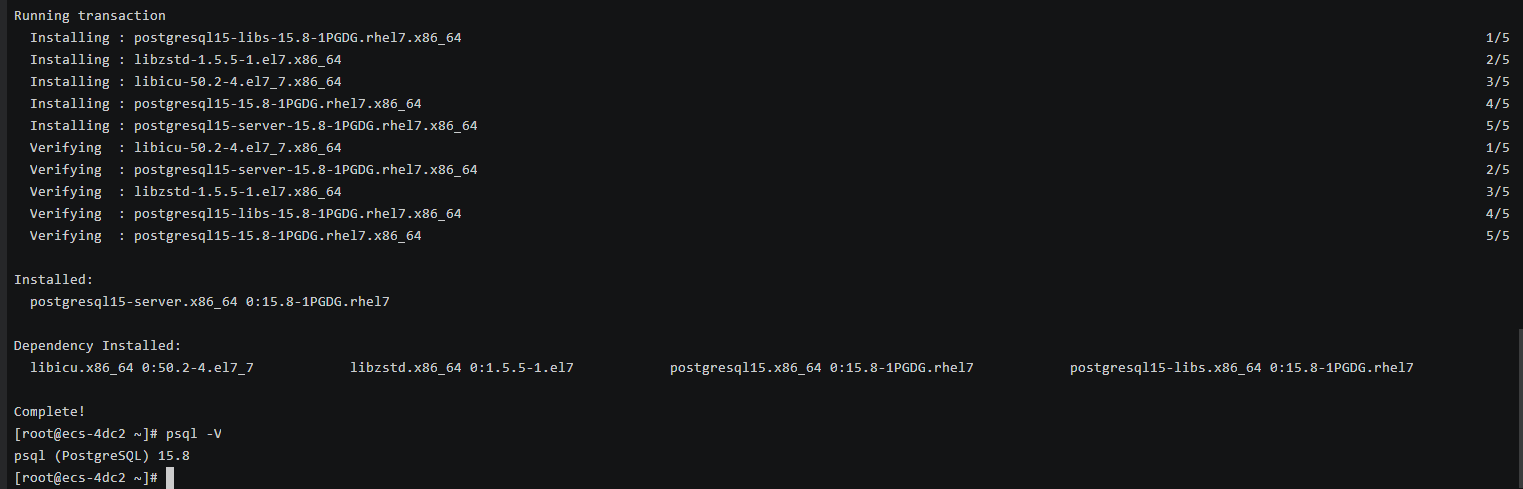
sudo yum install -y https://download.postgresql.org/pub/repos/yum/reporpms/EL-7-x86_64/pgdg-redhat-repo-latest.noarch.rpmsudo yum install -y postgresql15-serverCheck whether the installation is successful.
psql -VFigure 2 Successful installation
Method 2: Installing a PostgreSQL Client (No Restrictions on PostgreSQL Versions)
- Log in to the ECS. For details, see "Logging In to a Linux ECS Using VNC" in Elastic Cloud Server User Guide.
- On the Instances page of the RDS console, click the DB instance name to go to the Basic Information page.
- Choose Connectivity & Security from the navigation pane. In the Connection Information area, obtain the floating IP address and database port of the DB instance.
- On the ECS, check whether the floating IP address and database port of the DB instance can be connected.curl -kv 192.168.0.7 : 5432
- If yes, network connectivity is normal.
- If no, check the security group rules.
- Check the outbound rules of the ECS security group. If the destination address is not 0.0.0.0/0 and the protocol & port is not All, add an outbound rule that contains the RDS instance's floating IP address and port.
- Check the inbound rules of the RDS security group. Add an inbound rule that contains the ECS's private IP address and port. For details, see Configuring Security Group Rules.
- Install a PostgreSQL client.
Installation from source code: This installation method has no restrictions on RDS for PostgreSQL instance versions and ECS OS types.
The following uses an ECS using the EulerOS image as an example to describe how to install a PostgreSQL 16.4 client.
- To use SSL to connect to the DB instance, download OpenSSL on the ECS in advance.sudo yum install -y openssl-devel
- Obtain the code download link, run wget to download the installation package to the ECS, or download the installation package to the local PC and then upload it to the ECS.wget https://ftp.postgresql.org/pub/source/v16.4/postgresql-16.4.tar.gz
- Decompress the installation package.tar xf postgresql-16.4.tar.gz
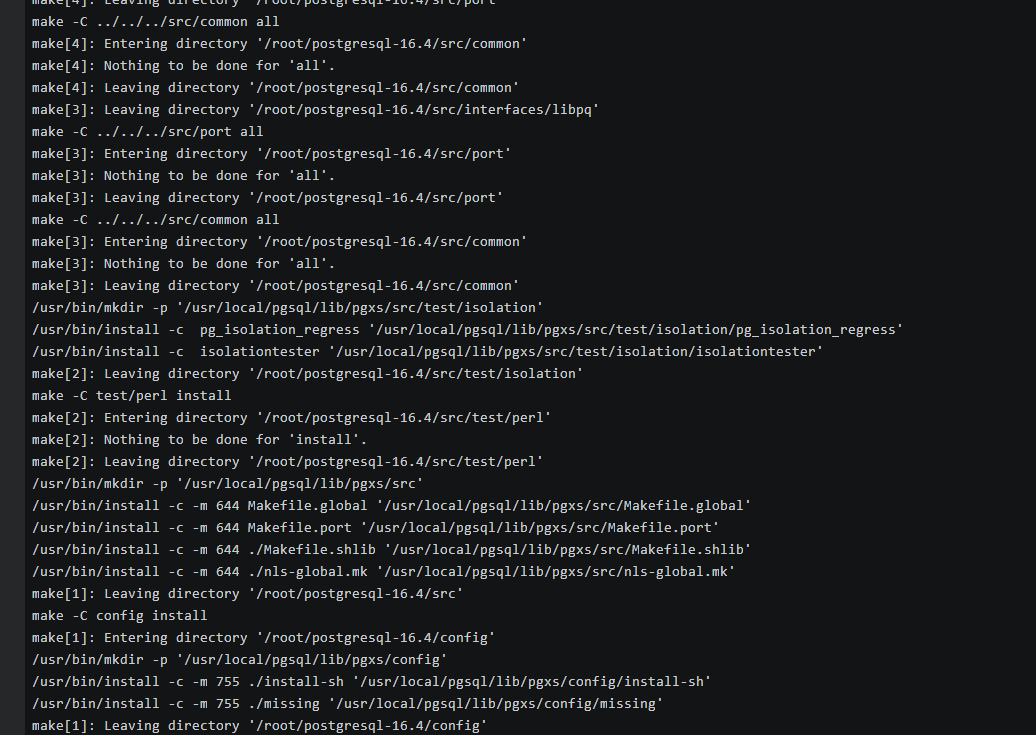
- Compile the code and then install the client.cd postgresql-16.4./configure --without-icu --without-readline --without-zlib --with-opensslmake -j 8 && make installNote
If --prefix is not specified, the default path is /usr/local/pgsql. The client can be installed in the simplest way.
Figure 3 Compilation and installation
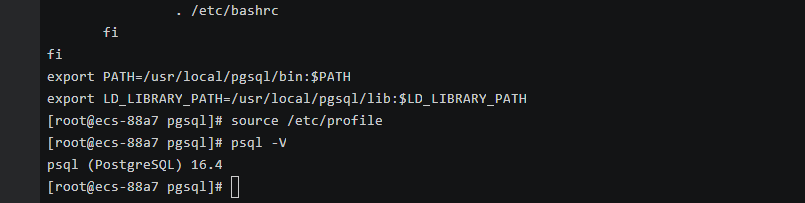
- Add the following code to the /etc/profile file to configure environment variables:export PATH=/usr/local/pgsql/bin:$PATHexport LD_LIBRARY_PATH=/usr/local/pgsql/lib:$LD_LIBRARY_PATHsource /etc/profile
- Test whether the psql is available.psql -V
Figure 4 Testing psql
- To use SSL to connect to the DB instance, download OpenSSL on the ECS in advance.
Step 4: Connect to the DB Instance Using a CLI (SSL Connection)
- On the Instances page of the RDS console, click the DB instance name to go to the Basic Information page.
- In the navigation pane, choose Connectivity & Security.
- In the Connection Information area, find the SSL field and click
 to download the package Certificate Download.zip. Then, extract the root certificate ca.pem and bundle ca-bundle.pem from the package.
 - Upload ca.pem to the ECS.
- Run the following command on the ECS to connect to the DB instance:
psql --no-readline -h <host> -p <port> "dbname=<database> user=<user> sslmode=verify-ca sslrootcert=<ca-file-directory>"
Example:
psql --no-readline -h 192.168.0.7 -p 5432 "dbname=postgres user=root sslmode=verify-ca sslrootcert=/root/ca.pem"
Table 7 Parameters Parameter
Description
<host>
Floating IP address obtained in 3.
<port>
Database port obtained in 3. The default value is 5432.
<database>
Name of the database to be connected. The default database name is postgres.
<user>
Administrator account root.
<ca-file-directory>
Directory of the CA certificate used for the SSL connection. This certificate should be stored in the directory where the command is executed.
sslmode
SSL connection mode. Set it to verify-ca to use a CA to check whether the service is trusted.
- Enter the password of the database account as prompted.Password:
If the following information is displayed, the connection is successful.
SSL connection (protocol: TLSv1.2, cipher: ECDHE-RSA-AES256-GCM-SHA384, bits: 256, compression: off)